


What Happens After a Warranty Part Is Approved: Testing, Where It Ships, Return Labels and What to Keep
Updated September 2026
Once the support team has verified a defect from your photos and approved a warranty part, Ella's Bubbles ships that warranty part to the original customer's address without charge. Parts such as hoses and control boxes are tested before they are packed, a control box shipment may include a return label so the old box can be diagnosed, and you should keep any replaced part until your ticket confirms the problem is solved. This article explains each of those steps so there are no surprises between approval and a working tub.
Where the Part Ships
The published warranty states that Ella's Bubbles will ship the part to the original customer's address, subject to verification of the defect or malfunction. Because the warranty is tied to the original installation address, that is where warranty parts go. When a tub was delivered through a dealer or retailer rather than to your home, the team will ask you to confirm the installation address on the ticket before packing anything, so please have it ready. Tracking, faster options and what support can see once a part is in transit are covered in where is my replacement part.
Testing Before Shipment
Warranty parts are checked before they leave. In practice that looks like this:
- Hoses are tested, then packed once the shipping address is confirmed.
- Control boxes are tested and configured before shipping. Because the box is set up in advance, you can skip the button-hold configuration step shown in the control box reset video when you connect it.
- Valves ship complete, so you or your installer can swap just the cartridge into the existing body or replace the whole valve.
Return Labels and the Old Part
A control box replacement may include a return label so the defective box can be sent back for diagnosis. For most other parts nothing needs to be returned, but keep the old part in a safe place until the ticket confirms the replacement fixed the issue. If a return is needed the team will say so on your ticket and tell you exactly what to do.
Installing the Replacement
Most warranty parts are straightforward swaps, and the team will point you to the right video or steps. For a control box, the old box is disconnected and removed and the new one connected in its place: the power cords, the air hoses and the light wire. Labor is not part of the warranty, so this work is done by you or your contractor, with free technical support on the ticket or by phone whenever you need it. Which cord plugs where identifies each control box, cord and air tube so nothing is left unplugged.
Watch: What Plugs into the Control Box

Chapters in this video
- 0:00 Introduction to Master Control Boxes The video introduces two master control boxes that manage the massage systems and heated seat in Ella's Bubbles walk-in tubs.
- 0:16 First Control Box Connections This section details the connections for the heater pads, air pump, water pump, and the main power input for the first control box.
- 0:41 Control Connectors and Switches The video explains where to connect the push buttons for the water pump, air blower, LED light, and the digital control keypad.
- 1:36 Second Master Control Box The second master control box is presented, showing its connections for the heated seat, air pump, water pump, and main power inlet.
- 1:55 20 Amp Power Connector The video highlights the 20 amp power connector for the second control box and explains how to identify its unique plug.
Watch: Master Control Box Explanation with chapters and a full transcript.
If your replacement part is a control box, this video is the map for reconnecting it. It shows two master control boxes that run the hydro pump, air blower, LED light and heated seat, and identifies each port: the heater pad connector, the air pump connector, the water pump connector and the power input. The small air-tube nipples receive the push-button switches for the water pump, air blower and LED light, a display port takes the digital keypad, and the ICL connector takes the chromatherapy light. It also explains the config switch and the green power LED, and notes that one box uses a 20 amp plug with a horizontal blade that requires a 20 amp receptacle. Because your replacement arrives already configured, you connect the lines, restore power and test.
Watch: The Reset Procedure You Can Skip
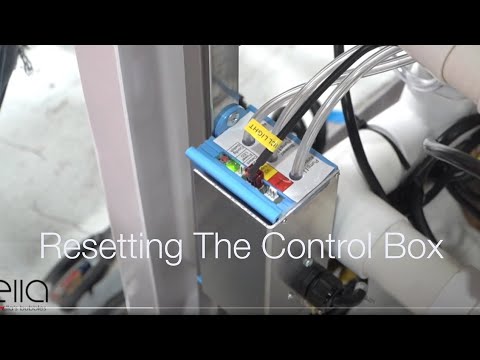
Chapters in this video
- 0:00 Disconnect Main Power Supply The video begins by showing how to disconnect the main power supply to the control box, and the green LED light goes out.
- 0:13 Disconnect All Function Connections The technician disconnects all function connections to the control box, recommending that each connection is marked before removal.
- 0:38 Disconnect Air and Water Pumps The technician disconnects all electrical connections to the air and water pumps that the tub may have.
- 0:59 Locate and Press Config Switch The technician locates the config switch on the control box and presses it until the green LED light cycles through its configuration process.
- 1:31 Reconnect Tub Components The technician reconnects all the tub's components, including the air and electrical lines, ensuring each is secured firmly.
- 1:49 Test All Tub Functions The technician tests all the tub's functions, including air, water, micro bubbles, and LED lights, to ensure they are working correctly.
Watch: Ella's Bubbles: Control Box Reset with chapters and a full transcript.
This is the control box reset video referenced above. It walks through disconnecting main power, marking and disconnecting every air tube and plug, restoring power, holding the config button until the LED cycles through one, two, three and four blinks, then reconnecting and testing the air, water, microbubble and LED functions. A pre-configured warranty box does not need the button-hold step, but the video is still the best guide to labeling and reconnecting the lines, and it is the procedure the team may ask you to run on an existing box before a replacement is approved. The written version is in how to reset your control box.
While You Wait
Ask the team whether there is a safe workaround in the meantime. For example, when a control box was on its way, the customer was able to unplug the air pump from the box and keep using the hydro massage until the replacement arrived. A tracking number is shared on your ticket once the part ships.
If the Part Arrives Damaged or Does Not Fix the Problem
- Reply on the same ticket rather than opening a new one, so the history stays together.
- For shipping damage, keep all packaging and attach photos of the box and the part.
- If the part is installed and the symptom continues, attach a short video showing the problem and describe what changed after the swap.
- The team reviews the video, walks through the next checks with you and arranges another part if that is what the evidence points to.
Faster Shipping
Ask on the ticket. The team can compare shipping options for your part and, depending on the situation, may be able to offer an upgraded service or explain what a faster option would involve. Any choice is confirmed with you before the part ships.
Related Guides
- Is the Replacement Air Blower the Right One for My Tub? How to Confirm the Match
- How Do I Replace a Broken Push Button and Its Air Hose?
- Ordering a Replacement Air, Hydro or Microbubble Pump: What to Send So the Right One Ships
- When a Replacement Tub Is Approved: The Release Form, Confirming Model and Options, and Who Handles Labor
- My Shower Was Approved for Replacement: How the Replacement Order Works and How to Check Its Status
- The Air Tube Fitting on My Hydro Pump Snapped Off. What Part Do I Need?
Common Questions
Where does a warranty part ship?
Are warranty parts tested before they go out?
Do I need to send the old part back?
What if the part arrives damaged or does not fix it?
Can a warranty part ship faster?
Can the part ship to a PO box or to my contractor?
Who installs the replacement part?
How will I know the part has shipped?
For anything specific to your model or your order, open a ticket at ellasbubbles.com/support or call your Ella dealer or the team at (800) 480-6850.
About this guide. Answers in the Ella’s Bubbles Support Center are compiled from real conversations with tub owners, our technicians’ notes and the product documentation, then reviewed by our team. Tub models and options have evolved over the years, so a detail here may differ slightly from your exact tub. If something looks different on yours, send us your serial number and a specialist will confirm it for your model.
Did this solve your question?
If not, open a ticket and our team will pick it up from here.
Open a Support Ticket Videos