


Installing Ella Shower Bases, the Flexible Shower Dam, and Shower Walls
Updated October 2026
Installing an Ella shower base and the flexible shower dam is a job for your own licensed contractor, with the technical support team available to help at every step. The accessible shower line includes barrier-free roll-in shower bases, low-threshold acrylic bases, cultured marble bases, multi piece shower wall systems, and the flexible collapsible dam that keeps water inside a barrier-free stall while letting wheelchairs roll right over it. This guide summarizes the installation of the bases, the dam and the walls, plus the warranty rules to know before the first hole is drilled.
Before Installation: Receive, Inspect, and Dry Fit
- An adult must be present at delivery to receive and inspect the unit and note any visible damage on the bill of lading before the driver leaves. If the unit cannot be fully inspected on the spot, for example in bad weather, sign the bill of lading with the words subject to further inspection. Report damage or missing parts within 48 hours of receipt, keeping all packaging, following the freight damage steps.
- Dry assemble the modular shower in any clean, open space before demolition. This confirms you received the correct panels and drain location, that everything is free of damage, and that the panels align. Take a picture of the dry fit for later comparison.
- Delay demolition of the existing bathtub area until you are confident the new unit is the correct size and condition.
Installing a Barrier-Free Five Piece Shower
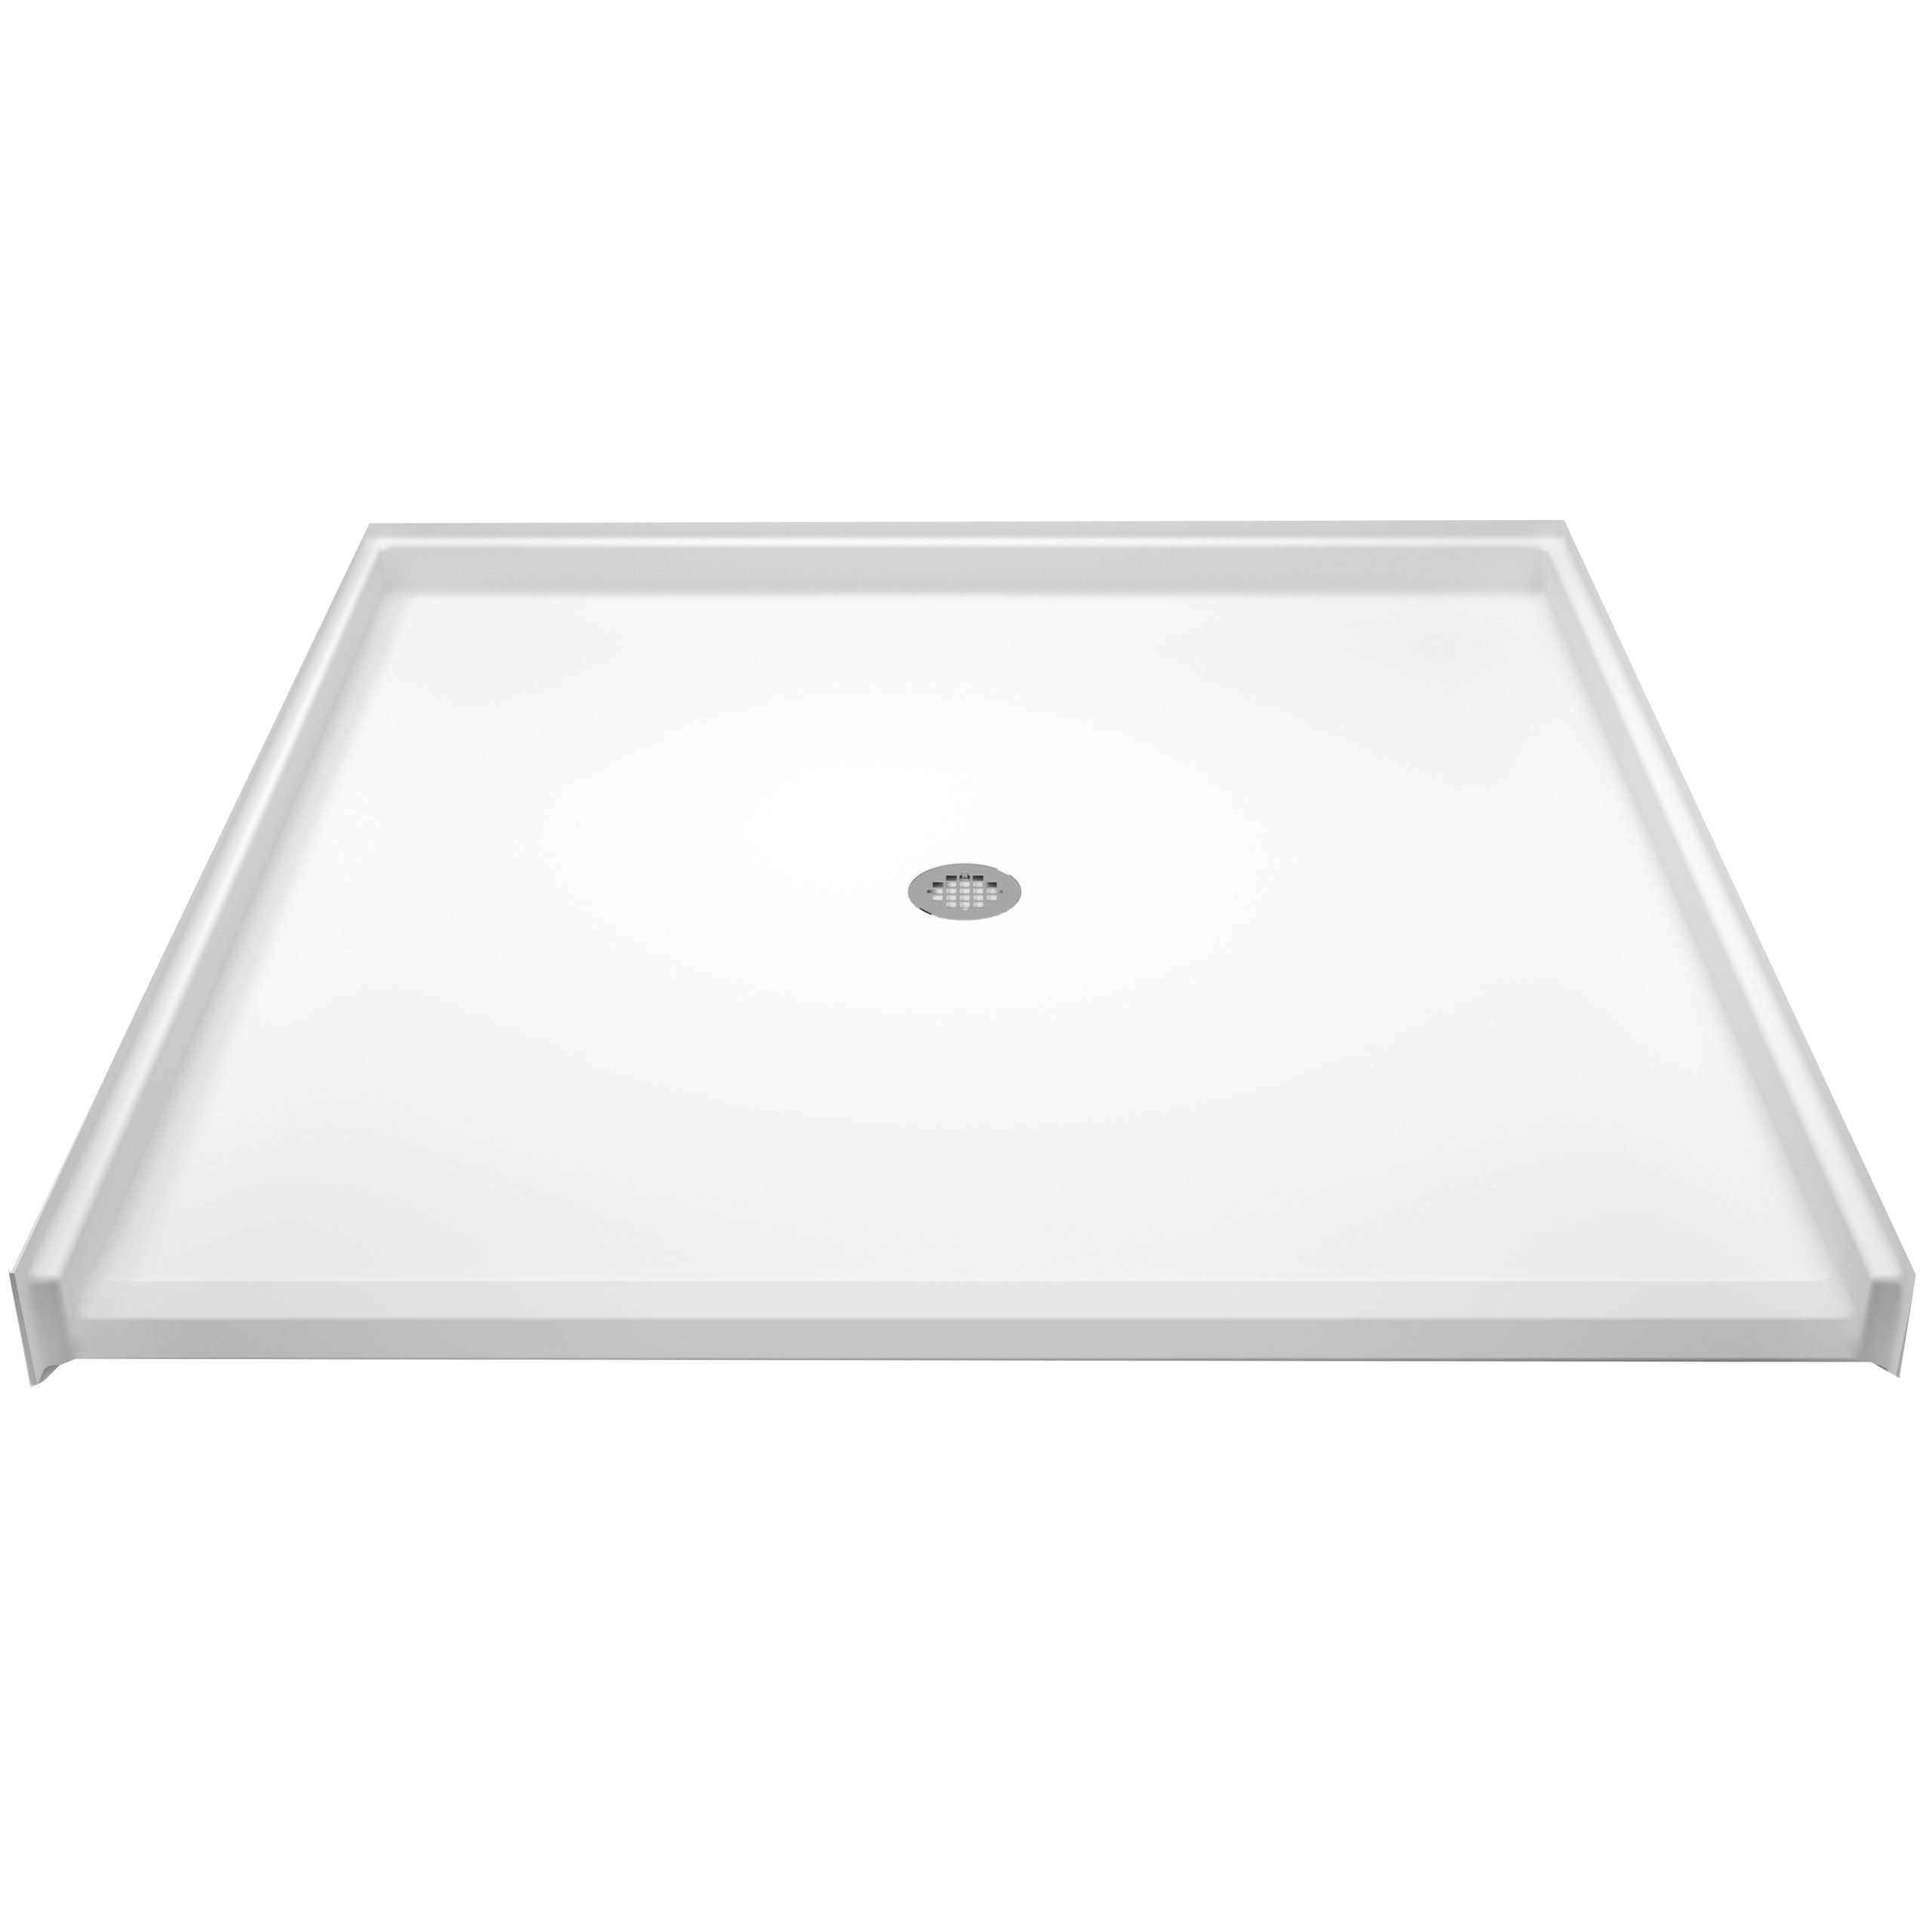

Chapters in this video
- 0:00 Receiving and Inspecting Your Shower The video provides visual guidance for installing a barrier-free five-piece shower, emphasizing the importance of inspecting the unit upon arrival and noting any damage.
- 1:32 Dry Assembling Your Modular Shower The installer dry assembles the modular shower in an open space to ensure correct panels, drain location, and proper alignment before moving it to the bathroom.
- 3:04 Preparing the Framing Pocket and Subfloor The installer checks the framing pocket for proper sizing, squareness, plumb, and level, making necessary adjustments and inspecting the subfloor for integrity.
- 4:05 Installing the Shower Pan and Drain The installer cleans the pocket, dry fits and levels the pan, installs the drain body, and adheres the pan to the subfloor using silicone adhesive and bracing.
- 7:40 Assembling and Securing Shower Panels The installer places protection on the floor, caulks the pan ledge, and installs the lower and upper back panels, securing them to the studs.
- 8:31 Installing the Valve Wall and Plumbing The installer caulks the pan ledge and vertical back wall seam, sets the panel, drills holes for the valve and supply outlet, and connects the PEX supply lines.
- 11:05 Adding Accessories and Finishing Touches The installer marks, drills, and caulks around pilot holes for accessories, then caulks all seams and the front edge of the threshold, recommending a water retainer and shower curtain.
Key steps from the video, which accompanies the manual: Watch: Barrier-Free 5-Piece Low-Threshold Shower Installation u2013 Complete Tutorial with chapters and a full transcript.
- Check the framing pocket against the framing diagrams, then check it for square, plumb, and level. Adjustments are more common than not; hang a plumb bob at the back wall and shim the pan or notch a stud as needed.
- Inspect the subfloor. A solid, non flexing, level subfloor is required; strengthen or replace weak material and clear all debris, since even a small pebble can affect the draft to drain. The base is designed to install on either a concrete or a wooden subfloor. On wood, check that the subfloor is sound and that it is flat and level, and if it is not, float it with leveling compound and allow it to harden fully before you set the base.
- Dry fit the pan, level it in both directions, temporarily fasten it, and mark the threshold line on the subfloor.
- Install the 2 inch no caulk shower drain body with plumber's putty, prepare the drain to local plumbing codes, and keep the required 10 inch by 10 inch opening around the drain so the drain area is not pushed out of position.
- Adhere the pan to the subfloor with three tubes of 100 percent clear silicone adhesive laid in a square pattern, with beads about three quarters of an inch or taller. Set the pan on your marks, secure it to all available studs with countersunk number 8 stainless screws, and check level and draft to drain one final time. If the floor is out of level more than 3/16 inch, fill the void with rapid setting modified thinset.
- While the adhesive cures, brace the unit near the drain for four hours, or weigh it down with water filled 5 gallon buckets, then recheck draft to drain.
- Trim the drain pipe, seat the lubricated rubber gasket bevel up, tighten the compression ring, and snap in the grid drain.
- Install the wall panels from the front using the pin and slot system: caulk the pan ledge and seams, set the lower and upper back panels, then the side panels, checking level and the corner gaps against your dry fit photo before screwing each flange to the studs.
- Mount your valve per its manufacturer's instructions, avoiding the steel reinforcement rods inside the panels, connect the hot and cold supplies, and test for leaks before the valve wall goes up.
- Caulk all seams and the front threshold edge, allow the caulk to cure fully before use, and add surface mount accessories such as grab bars with the client involved in placement.
The gel coat versions of these units, with their framing tables and fastener schedules, are in installing multi-piece gel coat showers.
Installing a Low-Threshold Three Piece Shower

Chapters in this video
- 0:00 Introduction to Low-Threshold Shower Installation This video provides visual guidance for installing a low-threshold 3-piece shower, emphasizing the importance of referring to the installation manual.
- 0:24 Dry Assembly and Pre-Installation Checks The installer dry assembles the modular shower to ensure correct panels, drain location, and proper alignment before moving it into the bathroom space.
- 1:54 Preparing the Framing Pocket and Subfloor The installer checks the framing pocket for proper sizing, square, plumb, and level, making necessary adjustments and inspecting the subfloor for integrity.
- 4:07 Installing the Drain Body and Base Support The installer installs the drain body, prepares the drain to meet local plumbing codes, and applies silicone adhesive for proper support and adhesion of the base.
- 5:53 Permanently Installing and Securing the Base The installer permanently positions and levels the shower base, securing it to all available studs and cutting the drain pipe even with the rubber gasket.
- 7:22 Installing the Wall Panels and Valve The installer installs the wall panels using a pin and slot system, then installs the valve, connecting the hot and cold water supply lines.
- 10:19 Finishing Touches and Accessories The installer caulks all seams, recommends client involvement for accessory placement, and suggests an optional flange trim molding kit for a seamless transition.
The process mirrors the five piece install, with a few differences worth calling out: Watch: Step-by-Step Low-Threshold Shower Installation for Remodeling with chapters and a full transcript.
- Pre position three short lengths of 1/2 inch PVC pipe in the framing pocket as slider rails, and lower the base onto them at a 45 degree angle to slide it into place.
- The base has a built in back support leg cut slightly short so it can be adjusted for unlevel floors. Proper installation requires solid contact between the bottom of the support leg and the subfloor, and your warranty depends on it. Measure the leg position, mark its line on the floor, and run silicone adhesive beads about one inch tall every two inches along that line.
- Lower the base over the drain pipe in small movements until it meets your threshold line, then secure one screw per wall, rechecking level as you go, since leaning into the shower can nudge the base out of level.
- Wall panels install front side only via the pin and slot system, just like the five piece unit, and all seams get 100 percent silicone.
Installing the Flexible Shower Dam
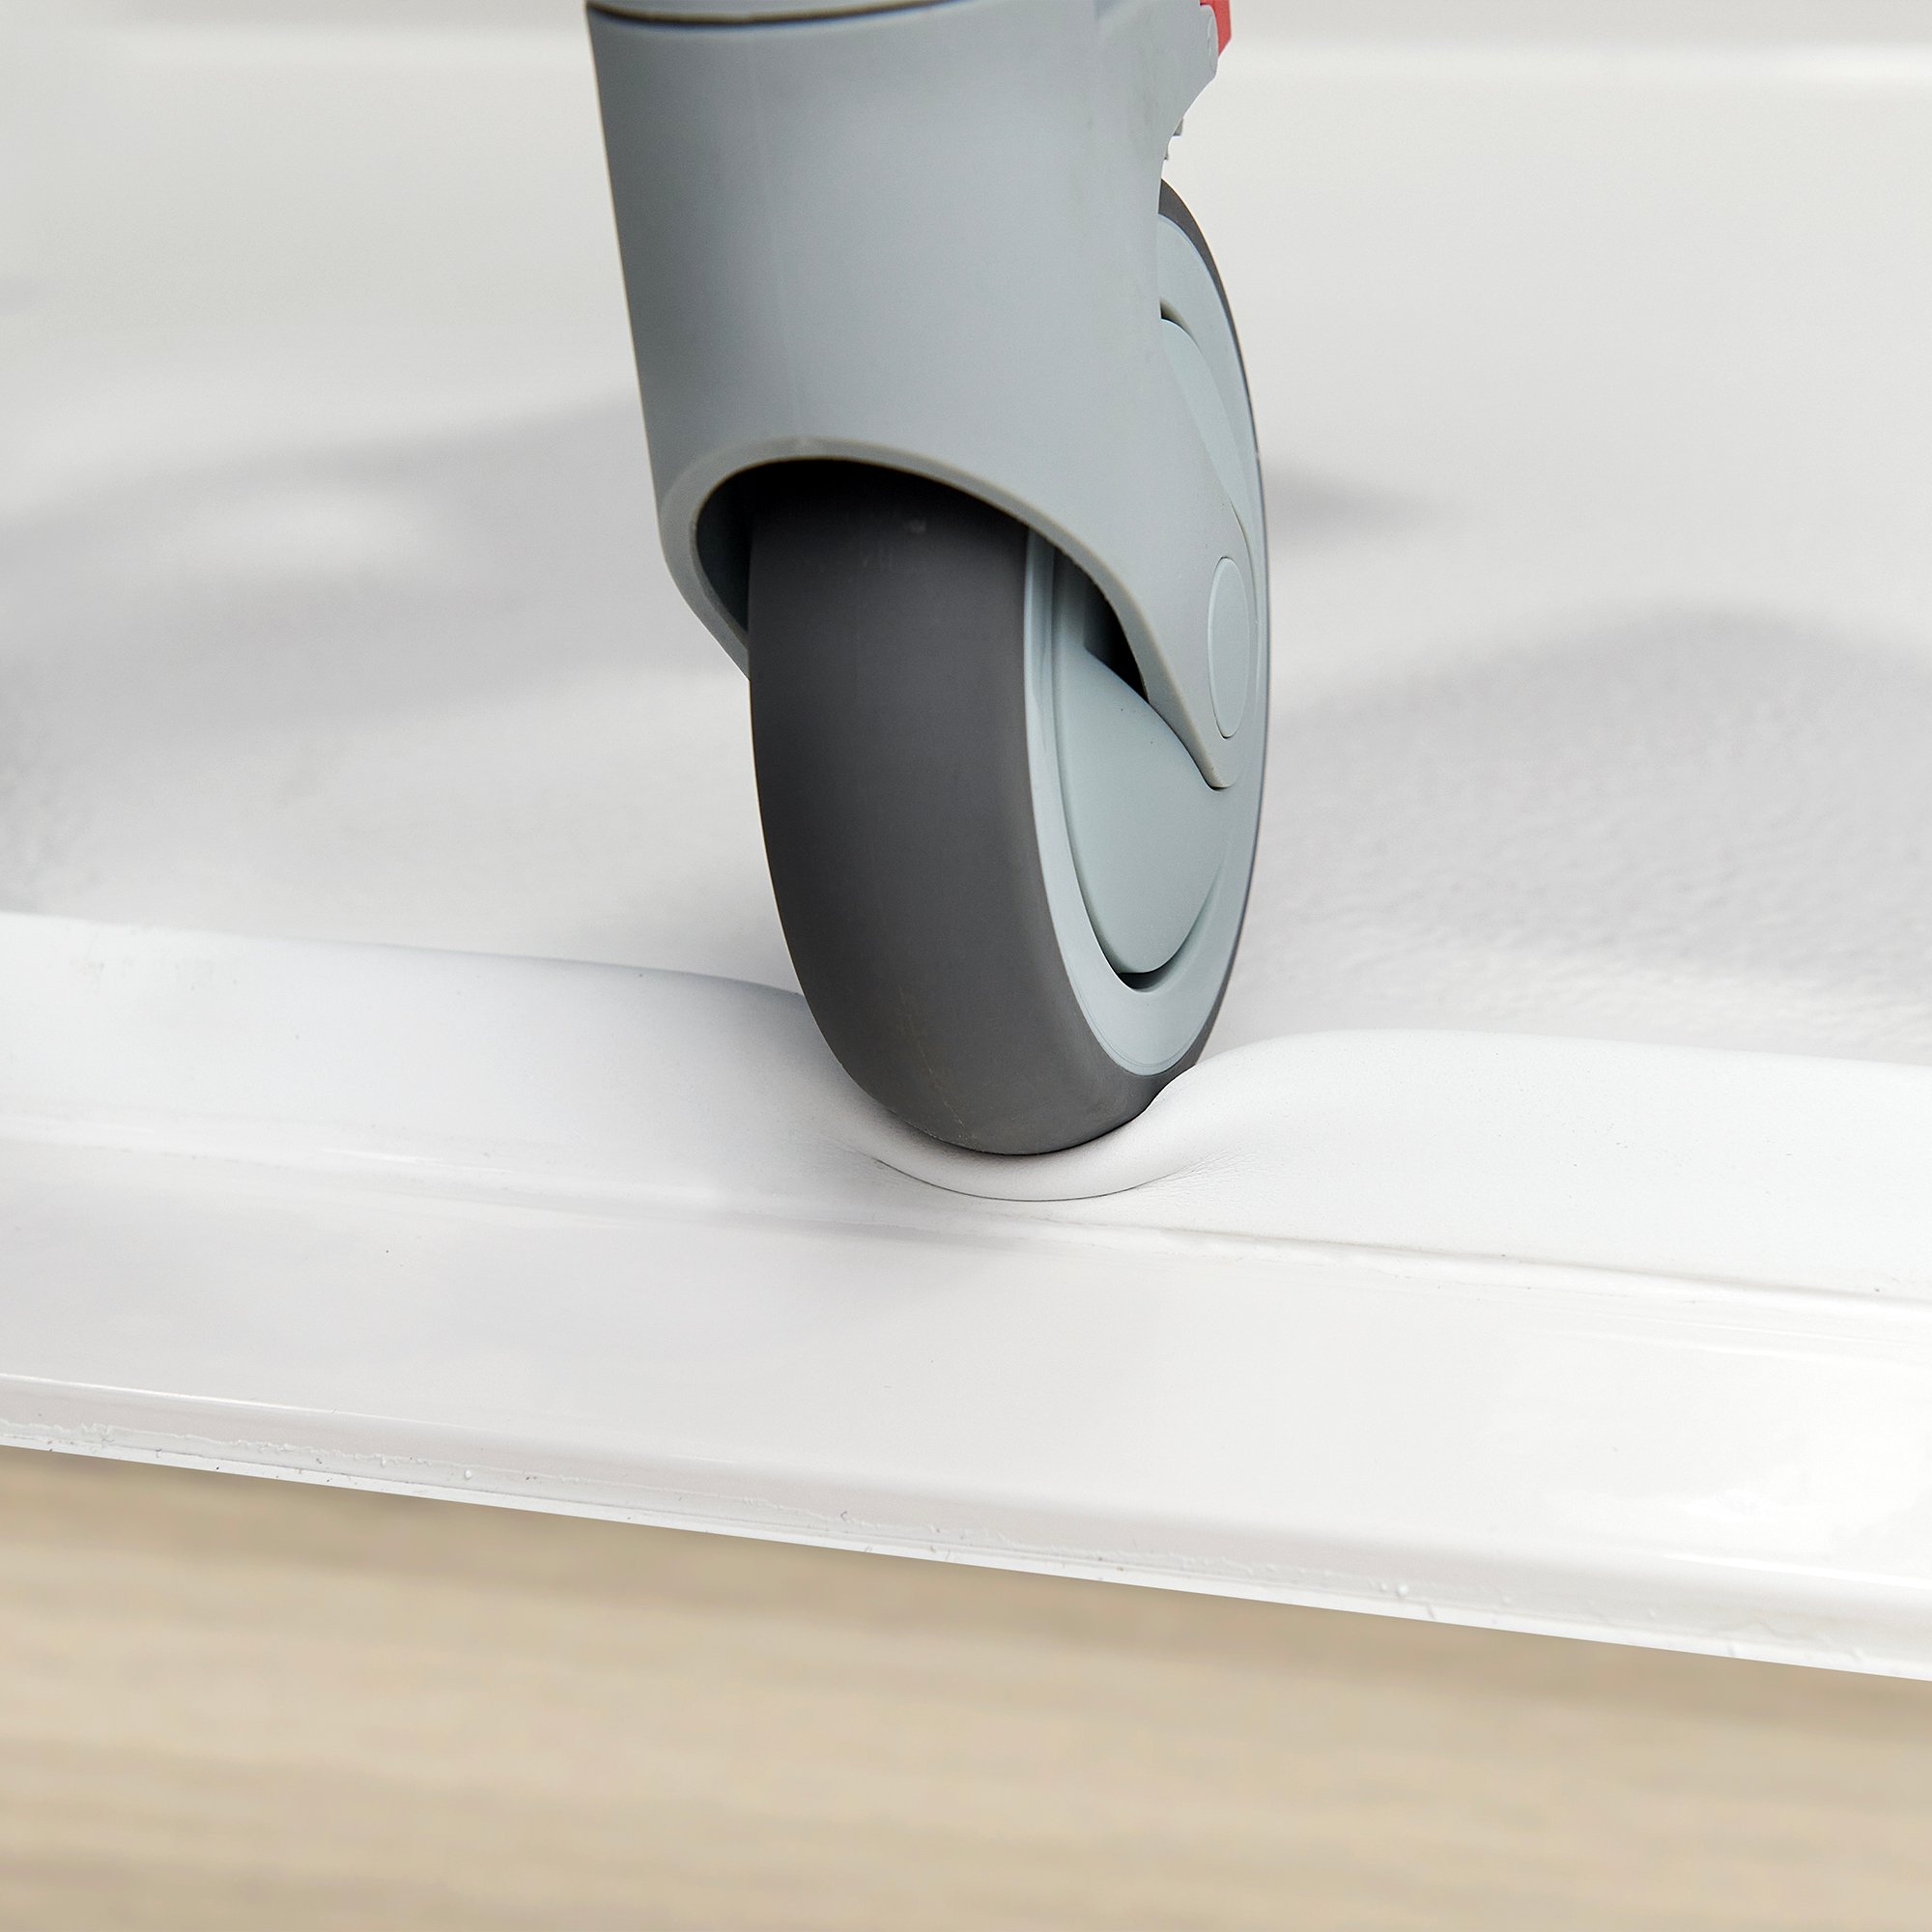

Chapters in this video
- 0:00 Introducing The Ella Shower Dam The Ella flexible shower dam is presented, highlighting its use for wheelchair users to easily roll into and out of a barrier-free shower base.
- 0:28 Installing The Shower Dam The installation process begins with measuring, cleaning surfaces, and applying the shower dam to the shower wall and floor.
- 1:25 Sealing The Shower Dam Painter's tape is applied, and a thin bead of silicone is used to seal the lower edge and end caps of the shower dam.
- 1:44 Final Result And Effectiveness The video shows the final appearance of the installed shower dam and demonstrates its effectiveness in containing water within the shower stall.
The collapsible rubber dam comes standard with roll-in wheelchair accessible shower bases. Wheels compress it on the way in and out, and it springs back to hold water in the stall. No special tools are needed; it attaches with strong water resistant self adhesive tape. The one non negotiable prerequisite: the surface under the dam must be chemically cleaned with isopropyl rubbing alcohol before installation, or the adhesive will not bond properly. Watch: The Ella Shower Dam u2014 Keep Water In, Roll In With Ease with chapters and a full transcript.
- Clean the mounting surface thoroughly with a clean rag and rubbing alcohol, and lay down a masking tape guide line.
- Measure the length needed, mark, and cut the dam carefully. Peel back the orange tape backing about 24 inches.
- Starting about 1/2 inch from the corner, press on and adhere the first 4 inches, then stretch, align, and pull toward the center of the shower, pressing firmly as you go.
- Pull and stretch to the opposite wall, aligning before removing the rest of the backing, then apply pressure along the entire length.
- Trim the excess about 1/2 inch from the wall, dry fit the end caps, then silicone the male end of each cap and insert it into the dam, caulking the wall side of each cap as well.
- Clean the surfaces again, run painter's tape along both sides, apply a thin bead of silicone along both lower edges of the dam and both end caps, smooth it, and let it cure. On tile floors, the grout lines beneath the dam must be caulked so water cannot travel under it.
Cultured Marble Bases and Shower Walls
Ella cultured marble shower bases, available in three sizes, are molded solid cultured marble with a glossy gel coat finish and an ADA compliant slip resistant textured floor. Unlike lightweight acrylic bases they are heavy, so plan on at least two people for the installation. Our travertine style shower wall panels are a natural quartz and granite composite with a gel coat surface, offered in eight, six, or four panel surrounds. A single person can carry and install the panels, which glue over drywall, plaster, painted walls, cement board, or even existing tile, and the factory finished edges join seamlessly or can be trimmed and cut for a custom fit. Thresholds, weights and drain styles for every base are compared in shower base sizes and thresholds compared; the SMC linear-drain bases have their own guide in installing the SMC low-profile shower bases.
Protect Your 30 Year Warranty
Roll-in, barrier-free, and low-threshold shower bases carry a 30 year limited warranty against defects in workmanship and material, valid when the product is installed and maintained per Ella's recommended procedures. Two rules matter most on install day: never drill into the shower base threshold, since drilling the threshold voids the warranty, and do not modify the product from the way it shipped. Labor and installation costs are not covered, coverage applies only to the original installation location, and any defect should be reported to us within 10 days of discovery. For the full terms, see warranty coverage for Ella shower bases, and for cleaning afterward see caring for Ella showers.
Related Guides
- How to Get the Installation Guide, Spec Sheet and Manual for Your Ella Shower Wall Kit or Enclosure
- How Close to the Wall Can the Drain Be on a Custom Shower Base, and Can It Be Centered?
- Does Ella Offer a Dome, Ceiling Panel or Light for Its Showers?
- Can You Tile Over an Ella Acrylic Shower Base?
- How Much Weight Can the Molded Shower Seat and Shower Base Hold?
- Mounting Grab Bars on Ella Shower Walls: Reinforced Backing, Finding the Zones, and Which Screws to Use
Common Questions
Does the base need a recess or a mortar bed?
How long does the pan need bracing after it is set?
Why is the 10 inch opening around the drain required?
Why must the dam surface be cleaned with alcohol?
Can the dam go on a tile floor?
Can I screw a door track into the threshold?
Still need help? Our team is always happy to assist. Open a ticket at ellasbubbles.com/support or call (800) 480-6850.
About this guide. Answers in the Ella’s Bubbles Support Center are compiled from real conversations with tub owners, our technicians’ notes and the product documentation, then reviewed by our team. Tub models and options have evolved over the years, so a detail here may differ slightly from your exact tub. If something looks different on yours, send us your serial number and a specialist will confirm it for your model.
Did this solve your question?
If not, open a ticket and our team will pick it up from here.
Open a Support Ticket Videos