


The Ella Shower Dam , Keep Water In, Roll In With Ease

Chapters in this video
- 0:00 Introducing The Ella Shower Dam The Ella flexible shower dam is presented, highlighting its use for wheelchair users to easily roll into and out of a barrier-free shower base.
- 0:28 Installing The Shower Dam The installation process begins with measuring, cleaning surfaces, and applying the shower dam to the shower wall and floor.
- 1:25 Sealing The Shower Dam Painter's tape is applied, and a thin bead of silicone is used to seal the lower edge and end caps of the shower dam.
- 1:44 Final Result And Effectiveness The video shows the final appearance of the installed shower dam and demonstrates its effectiveness in containing water within the shower stall.
The Ella flexible shower dam is presented for barrier-free, wheelchair-accessible shower bases, showing how it keeps water in the shower stall while allowing easy roll-in access.
The Ella flexible shower dam is designed for exclusive use with a barrier-free wheelchair accessible shower base. This compressible, waterproof dam allows wheelchair users to roll into and out of the shower base with ease, as the wheels roll over the material, which then returns to its original shape. This feature helps contain water within the shower stall.
Installation of the shower dam begins with precise measuring and thorough cleaning of all surfaces with denatured alcohol. A tape line is used as a guide before cutting the material. Silicone caulk is applied to all gaps, and the dam is secured snugly against the shower wall and floor. Painter's tape is then used to apply a thin bead of silicone along the lower edge and end caps of the dam, ensuring all gaps are sealed for effectiveness in containing water.
- Measuring and cutting the shower dam
- Cleaning surfaces with denatured alcohol
- Applying silicone caulk to gaps
- Sealing the lower edge and end caps
Step by step help for this topic: Installing Ella Shower Bases, the Flexible Shower Dam, and Shower Walls, Installing the SMC Low-Profile Shower Bases: 1 Inch Reversible Linear Drain and Barrier-Free Linear-Drain Bases and Caring for Ella Showers: AcrylX Stalls, Gel Coat Units, SMC Bases, Niches, Teak Seats and the Flexible Dam.
Video transcript1 paragraph · 2:04
presenting the Ella flexible shower dam for exclusive use with a barrier-free wheelchair accessible shower base this flexible compressible waterproof dam is perfect for wheelchair users to roll in and roll out of the barrier-free shower base the wheels simply roll over the compressible material while entering or exiting and the dam returns to its original shape so you can shower and keep the water in the shower stall here's how it's installed Begin by measuring precisely clean all surfaces thoroughly with denatured alcohol place a tape line down on the surface as a guide carefully measure how much material will be needed Mark and then cut carefully take the plastic and cap and insert as indicated apply silicone COA to all gaps pull the red tape covering back about an inch place the dam down snugly against the shower wall and floor slowly pull the tape cover away as you make your way down the dam secure with pressure along the entire length of the dam once the tape guide is removed clean all surfaces again and place Place painter tape down on both sides of the dam apply a thin bead of silicone along the lower edge of the dam on both sides smooth the gaps carefully make sure to apply the silicone to both end caps as well making sure all gaps are secure here's how the final result should look and here's how effective the ell shower dam is in containing water
Guides that use this video
- 📖Walk-In Tub or Low-Threshold Shower? Comparing Ella Options for Mobility, Space and CaregiversWalk-In Tub Models
- 📖Installing Ella Shower Bases, the Flexible Shower Dam, and Shower WallsShowers, Panels & Accessories
- 📖Installing the SMC Low-Profile Shower Bases: 1 Inch Reversible Linear Drain and Barrier-Free Linear-Drain BasesShowers, Panels & Accessories
- 📖Shower Base Sizes and Thresholds Compared: AcrylX Barrier-Free, SMC Linear-Drain, Molded-Seat and Cultured Marble BasesShowers, Panels & Accessories
- 📖Custom-Size Shower Bases: Size Ranges, Threshold Options, Drain Placement Rules, Construction, and How to Request OneShowers, Panels & Accessories
- 📖Every Shower Video in One Place: Low-Threshold and Barrier-Free Installs, the Shower Dam, Shower Bases, Cultured Marble Walls, CNC Wall Kits and Grout-Free PVC TileShowers, Panels & Accessories
- 📖What is a roll-in shower for wheelchair users?Showers, Panels & Accessories
- 📖What Is the Difference Between a Roll-In Shower and a Walk-In Shower?Showers, Panels & Accessories
- 📖What is a roll-in shower and how does it work?Showers, Panels & Accessories
- 📖What is a roll-in shower and who is it designed for?Showers, Panels & Accessories
- 📖Should I choose a walk-in tub or a roll-in shower?Showers, Panels & Accessories
- 📖What is a roll-in shower and who should get one?Showers, Panels & Accessories
- 📖What Is a Shower Dam and When Do You Need One?Showers, Panels & Accessories
- 📖What is a shower dam and when do you need one?Showers, Panels & Accessories
- 📖What is the difference between a walk-in tub and a roll-in shower?Showers, Panels & Accessories
- 📖Which Ella Shower Pan Is Best for Wheelchair Accessibility?Showers, Panels & Accessories
- 📖Can the Flexible Shower Dam Be Cut to Fit a Shorter Opening?Showers, Panels & Accessories
- 📖Walk-in tub vs roll-in shower: which is better for my needs?Showers, Panels & Accessories
- 📖What Is a Stall Shower and How Does It Differ From Others?Showers, Panels & Accessories
- 📖What is a shower dam and when do you need one?Showers, Panels & Accessories
- 📖Which Ella shower kits fit a 36x60 space with wheelchair access?Showers, Panels & Accessories
- 📖What Is a Roll-In Shower and What Does It Look Like?Showers, Panels & Accessories
- 📖What is a shower dam and when do you need one?Showers, Panels & Accessories
- 📖What are the standard sizes for shower pans and bases?Showers, Panels & Accessories
- 📖Caring for Ella Showers: AcrylX Stalls, Gel Coat Units, SMC Bases, Niches, Teak Seats and the Flexible DamMaintenance & Cleaning
More Showers, Panels & Accessories videos
 ▶2:19How to Cut Acrylic Shower Wall Panels Safely | Ella’s Bubbles Cutting GuideCustomers learn how to cut acrylic shower wall panels safely for Ella's Bubbles walk-in tubs. This video provides a cutting guide for acrylic…used in 15 guides
 ▶1:09CNC Engraved Patterns in Acrylic Wall KitsCNC engraved patterns are shown on acrylic wall kits, offering a decorative option for Ella's Bubbles shower installations. These wall kits…used in 9 guides
 ▶0:20Upgrade Your Bathroom With Custom Engraved Shower WallsElla's new CNC-Engraved Acrylic Wall Kit transforms your bathroom with one-of-a-kind patterns. This kit features a 3-panel configuration…used in 2 guides
 ▶0:23Slip-Resistant, Strong Shower Bases - Built to LastElla's Bubbles SMC shower bases offer slip-resistant, reinforced strength for bathroom remodels. These durable bases are engineered for…used in 2 guides
 ▶1:02Installing a Waterfall Tub Faucet For Your Walk-In Tub (Is It Worth It?)Installing a Waterfall Tub Faucet for an Ella's Bubbles walk-in tub involves wall-mounting a brass faucet with a 24-inch slider bar and…used in 4 guides
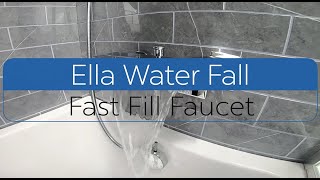 ▶1:01The Luxurious Walk-In Tub Upgrade You Need - Waterfall FaucetThe Ella waterfall fast-fill faucet delivers water in a soothing cascade, filling your walk-in tub quickly. This faucet includes an extendable…3 chapters · used in 13 guides
More Showers, Panels & Accessories videos → All videos → Watch on YouTube →
 Videos