


Barrier-Free 5-Piece Low-Threshold Shower Installation - Complete Tutorial | Ella’s Bubbles

Chapters in this video
- 0:00 Receiving and Inspecting Your Shower The video provides visual guidance for installing a barrier-free five-piece shower, emphasizing the importance of inspecting the unit upon arrival and noting any damage.
- 1:32 Dry Assembling Your Modular Shower The installer dry assembles the modular shower in an open space to ensure correct panels, drain location, and proper alignment before moving it to the bathroom.
- 3:04 Preparing the Framing Pocket and Subfloor The installer checks the framing pocket for proper sizing, squareness, plumb, and level, making necessary adjustments and inspecting the subfloor for integrity.
- 4:05 Installing the Shower Pan and Drain The installer cleans the pocket, dry fits and levels the pan, installs the drain body, and adheres the pan to the subfloor using silicone adhesive and bracing.
- 7:40 Assembling and Securing Shower Panels The installer places protection on the floor, caulks the pan ledge, and installs the lower and upper back panels, securing them to the studs.
- 8:31 Installing the Valve Wall and Plumbing The installer caulks the pan ledge and vertical back wall seam, sets the panel, drills holes for the valve and supply outlet, and connects the PEX supply lines.
- 11:05 Adding Accessories and Finishing Touches The installer marks, drills, and caulks around pilot holes for accessories, then caulks all seams and the front edge of the threshold, recommending a water retainer and shower curtain.
An installer demonstrates the complete installation of a barrier-free 5-piece low-threshold shower, covering receiving, dry assembly, framing, pan and drain setup, panel securing, plumbing, and accessory installation.
The video provides visual guidance for installing a barrier-free 5-piece shower, beginning with inspecting the unit upon arrival and noting any damage. The installer then dry assembles the modular shower in an open space to confirm correct panels, drain location, and proper alignment before moving it to the bathroom. This step helps ensure the panels and pan are free from damage and defect.
Next, the installer prepares the framing pocket and subfloor, checking for proper sizing, squareness, plumb, and level, and making necessary adjustments. The shower pan and drain installation follows, which includes cleaning the pocket, dry fitting and leveling the pan, installing the drain body, and adhering the pan to the subfloor using silicone adhesive and bracing. The video emphasizes the importance of a solid, non-flexing subfloor and a perfectly level pan for proper wall installation.
The assembly continues with securing the shower panels, caulking the pan ledge, and installing the lower and upper back panels to the studs. The valve wall and plumbing are then installed, involving caulking, setting the panel, drilling holes for the valve and supply outlet, and connecting PEX supply lines. Finally, the installer adds accessories and finishing touches, marking, drilling, and caulking around pilot holes for accessories, and caulking all seams and the front edge of the threshold.
- Inspect shower unit upon arrival
- Dry assemble modular shower panels
- Prepare framing pocket and subfloor
- Install shower pan and drain body
- Secure shower panels to studs
- Install valve wall and plumbing
Step by step help for this topic: Installing Ella Shower Bases, the Flexible Shower Dam, and Shower Walls, Installing Multi-Piece Gel Coat Showers: Barrier-Free Roll-In (BF) and Low-Threshold (SH) Units and Every Shower Video in One Place: Low-Threshold and Barrier-Free Installs, the Shower Dam, Shower Bases, Cultured Marble Walls, CNC Wall Kits and Grout-Free PVC Tile.
Video transcript1 paragraph · 12:54
this installation video provides a visual guidance for the installation of a barrier-free five piece shower please refer to the installation manual for specific details relating to the installation of your shower an adult must be present during the arrival of your unit to receive inspect and note on the Bill of Lading any visual damage to the carton or crate that may have occurred during transit do not allow the driver to leave until this is done failure to do so may limit or void your claim with the LTL carrier for repair or replacement photograph any suspicion of damage for your records and contact your sales representative immediately check all loose accessories to confirm you've received what you've ordered and inspect for any damage during transit any defects damaged or misalignment should be photographed and reported immediately in the event the unit cannot be adequately inspected on the spot do say to inclement weather we recommend signing the bill of lading with the following words subject to further inspection failure to have this phrase legally releases the trucking company of all responsibility for concealed damage as they close the bill permanently leaving you with no recourse now is the time to dry assemble your modular shower prior to moving into the bathroom space this procedure can be performed on any clean dry and open space but this is an important step for ensuring that you have received the correct panels you've received the correct drain location the panels and pan are free from damage and defect and the panels align properly when assembled prior to installing in the framing pocket take a picture of the unit now the purpose and benefit will be covered in a later step the note it is a wise choice to delay demolition of the existing bathtub area until you're confident that your new unit is the correct size and and condition you will not want your customer to be without a working bathroom while waiting for a replacement remember slow is fast the following is a list of the required tools the following is a list of the materials needed check the framing pocket to ensure it is sized properly with the dimensions provided on the framing diagrams page in your installation instructions next check the pocket for square plumb and level and make the necessary adjustments no it is more common than not that adjustments will need to be made to start by hanging a plumb bob from the framing beginning of the back wall this is critical to your installation in this demonstration the wall was not plumbed a solution is to either shim the pan away from the wall or notch the stud this is critical to a proper installation of the back wall panels slight variances will affect plumb walls and uneven grout lines inspect the subfloor for level and structural integrity a solid non flexing subfloor is required strengthen and replace any weak or damaged subfloor materials ensure pocket is cleaned from all debris even a small pebble can affect the draft to drain dry fit your pan to ensure it fits in the frame properly level pan in both directions ensuring the bubble is perfectly centered like the foundation to a home this is vital to the walls installing properly resulting in consistent grout lines temporarily fastened to wall with one screw shimming if necessary draw a line on the subfloor indicating the front point of the threshold and on the stud above the flange remove the pan now it is time to install the drain body remove the inside neoprene gasket and compression ring from the drain and set aside for a later step install the two inch no Cult shower drain body on the pan with plumber's putty tighten the nut until snug and excess putty squeezes out around the flange remove excess prepare drain to meet local plumbing codes the details for the drain core area can be found in the instructions on the framing diagrams page a 10 inch by 10 inch opening around the drain is required to receive the shower pan and prevent the drain area from being pushed up out of its engineered position failure to do so will cause cuddling in your shower step out and extend the drain pipe two to four inches above the floor this will be trimmed at a later step the pan is ready to be adhered to the subfloor use three tubes of 100% clear silicone adhesive in a square pattern as shown the adhesive should be applied at the height that ensures contact with the pan as it said in place which means each bead of silicone should be about three-quarters of an inch or greater place the pan in pocket positioning two previously marked lines secure the pan to all available studs shimming where necessary countersinking number eight stainless steel screws this allows the screw head to be flush with the finished flange so as to not interfere with the finished wall installation check for level and draft to drain one final time this will be the last opportunity to ensure a perfectly level pan that has draft terrain before installing the walls note if floors are out of level more than 3/16 of an inch you will need to fill the void using a rapid modified thinset that will ensure your base has solid non flexing support while the adhesive cures the pan needs to be secured to the floor using one of the following two methods the bracing is the preferred method as it has demonstrated over time to provide the best results brace the unit as close to the drain as possible as shown a properly braced threshold will result in flush contact to the subfloor along the entire threshold leave braces intact for four hours after four hours remove the braces and check draft to drain one final time and when bracing is not possible an alternative method is to weigh down the pan with 5-gallon buckets filled with water as shown again after four hours remove the weights and check draft to drain one final time cut the drain pipe even with the top of the rubber gasket using an inside pipe cutting tool the using plumbers grease lubricate the inside of the rubber gasket and slide over the drain pipe with beveled edge facing up push down until it sets itself then screw compression ring into place until tight then snap the grid drain into place place protection on the floor to prevent scratches and deems to the finish while completing the assembly process the protection can be cut from the cardboard packaging as the example shown here your shower features a pin and slot system that enables you to install all panels from the front finished side without requiring rear access caulk back wall pan ledge encircling all pins set the lower back panel into place the check for level secure to studs with screws shimming or notching where necessary repeat the process for upper back panel caulk pan ledge and vertical back wall seam of the panel opposite the valve wall set panel on ledge and slide backward into place this may require force using a wood block and hammer as shown check for level before screwing flange to studs inspect the gap seams in the corners and on the base the gaps should match the picture-taking in the dry fit procedure if there is a larger gap this means the base is not level or the back wall is not square in plumb now is the time to correct once corrected secure wall to studs with screws shimming were necessary to ensure wall surfaces are flushed using very soapy water wipe away any excess adhesive that may have squeezed out refer to the valve manufacturer's instructions for conventional sweat installations for this demonstration we'll be installing a valve with pecs connections first find the desired location of your valve and apply protective masking tape over the area to be cut each wall panel has steel rod supports around the perimeter be sure to check that where you are about to drill does not interfere with one of these rods mark the center of your valve and drill a hole in a diameter listed in your valve instructions then drill a one-inch hole for the supply outlet mount the valve directly to the panel by connecting the front trim plate to the valve body using the mounting screw provided by the valve manufacturer next mount the supply outlet to the sharkbite eared elbow the framing Cove has been prepared to receive PEX pipe in a looped pattern to prevent kinking and allow ease of connection from the valve to the water supplies connect the hot and cold water pecs supply lines using pecks or sharkbite fittings notice the installers are using 90 degree fittings which work best in this application and while the wall was resting on the floor and fully connected now is the time to turn the water back on and test for leaks caulk all seams set the panel on ledge and slide backward into place now this may require force using a wood block and Hammer as shown check for level and secure two studs using shims where necessary your shower is fully reinforced and ready to receive surface mount accessories now or anytime in the future it is highly recommended the client be involved in identifying the ideal placement of accessories according to their needs always mark drill and call in a circular pattern around pilot holes for all accessories the unit is designed to allow out 1/8 inch gap at the seams caulk all seams as well as the front edge of the threshold and do not use your shower until caulk is cured see caulk instructions for cure time a premium caulk is recommended for fast to day installations a 3 inch white flange trim molding kit is an available option that transitions the drywall to the shower covering the gap during the removal of your existing tub or shower it's recommended that you cut the wall board away approximately one inch beyond the perimeter or outside edge of the nailing flange of your shower unit this step will minimize the amount of drywall patching require a collapsible water retainer and weighted shower curtain are recommended and available for purchase when installed properly band paired together they provide an effective and safe solution for keeping water in your barrier-free shower during use ask your sales representative for all water splash and accessory options and detailed installation instructions congratulations you've successfully installed your barrier-free shower providing years of safety and independence
Guides that use this video
- 📖Ella Shower Rough Opening, Standing Area and Floor Width: What to Measure Before You FrameSizes, Fit & Measuring
- 📖Installing Ella Shower Bases, the Flexible Shower Dam, and Shower WallsShowers, Panels & Accessories
- 📖Installing the 60 x 33 Three-Piece Low-Threshold Shower With Molded Seat (Liberty 24 and 36)Showers, Panels & Accessories
- 📖Installing Multi-Piece Gel Coat Showers: Barrier-Free Roll-In (BF) and Low-Threshold (SH) UnitsShowers, Panels & Accessories
- 📖Installing Shower Seats, Folding Benches, the Fold-Up Chair, Teak Seat, Grab Bar Shelf and the Caregiver Curtain RodShowers, Panels & Accessories
- 📖Every Shower Video in One Place: Low-Threshold and Barrier-Free Installs, the Shower Dam, Shower Bases, Cultured Marble Walls, CNC Wall Kits and Grout-Free PVC TileShowers, Panels & Accessories
- 📖What the Ella Acrylic Shower Base Is Made Of and How It Is InstalledShowers, Panels & Accessories
- 📖Installation Instructions and Spec Drawings for One-Piece and Multi-Piece Shower UnitsShowers, Panels & Accessories
- 📖Is a 3/4-Inch Shower Base Threshold ADA Compliant for a Commercial Building?Showers, Panels & Accessories
- 📖What Is the Difference Between a Roll-In Shower and a Walk-In Shower?Showers, Panels & Accessories
- 📖How Do I Measure for a New or Replacement Shower Pan or Base?Showers, Panels & Accessories
- 📖How do I build or install a walk-in shower at home?Showers, Panels & Accessories
- 📖Where Can I Buy a Fiberglass or Acrylic Shower Pan or Base From Ella?Showers, Panels & Accessories
- 📖How Do You Build a Handicap Accessible Walk-In Shower at Home?Showers, Panels & Accessories
- 📖What is a shower pan and what does it actually do?Showers, Panels & Accessories
- 📖Where should grab bars go in a shower or walk-in tub?Showers, Panels & Accessories
- 📖Are do-it-yourself walk-in shower kits worth it for your bathroom?Showers, Panels & Accessories
- 📖How do you install or attach Ella shower wall panels and surrounds?Showers, Panels & Accessories
- 📖Where Should Grab Bars Be Installed in a Shower?Showers, Panels & Accessories
- 📖Should I use a prefab shower pan or build a custom one?Showers, Panels & Accessories
- 📖What is a shower base, and what makes an acrylic one different?Showers, Panels & Accessories
- 📖Which Do-It-Yourself Walk-In Shower Kits Does Ella's Bubbles Offer?Showers, Panels & Accessories
- 📖How Do You Build a Custom Shower From Base to Walls?Showers, Panels & Accessories
- 📖What Is a Stall Shower and How Does It Differ From Others?Showers, Panels & Accessories
- 📖What Is a Shower Stall, and How Is It Different From a Tub Shower?Showers, Panels & Accessories
- 📖How Is a Walk-In Shower Installed or Fitted in a Bathroom?Showers, Panels & Accessories
- 📖What Is a Roll-In Shower and What Does It Look Like?Showers, Panels & Accessories
- 📖What Is a Stall Shower and How Is It Different From Other Showers?Showers, Panels & Accessories
- 📖What Accessible Shower Options Help Someone Who Cannot Step Over a Tub?Showers, Panels & Accessories
- 📖What is an SMC shower base and is it a good choice?Showers, Panels & Accessories
- 📖Who installs walk-in showers, and does Ella's Bubbles install them?Installation & Leveling
- 📖What Is a Shower Flange and What Does It Do?Installation & Leveling
- 📖Who Installs an Ella Shower Pan or Shower Base?Installation & Leveling
- 📖How do you fit and install a walk-in shower base and walls?Installation & Leveling
- 📖Can I Install a Walk-In Shower or Wall Panel Kit Myself?Installation & Leveling
- 📖What is a shower flange and what does it do?Installation & Leveling
- 📖Choosing a Shower Valve and Cutting the Valve and Shower-Head OpeningsPlumbing & Electrical
- 📖Shower Drain Rough-In: How Far the Drain Sits From the Back Wall and Side WallPlumbing & Electrical
- 📖Shower Unit Arrived Damaged or Missing Hardware: What Gets Repaired, Replaced or ReorderedTroubleshooting & Repairs
- 📖My Shower Wall Panels Do Not Fit the Installed Base. What Can Be Done?Troubleshooting & Repairs
- 📖My Shower Has Finish Flaws, a Crack at the Flange, or Sections That Do Not Line Up: What to DoTroubleshooting & Repairs
More Showers, Panels & Accessories videos
 ▶2:19How to Cut Acrylic Shower Wall Panels Safely | Ella’s Bubbles Cutting GuideCustomers learn how to cut acrylic shower wall panels safely for Ella's Bubbles walk-in tubs. This video provides a cutting guide for acrylic…used in 15 guides
 ▶1:09CNC Engraved Patterns in Acrylic Wall KitsCNC engraved patterns are shown on acrylic wall kits, offering a decorative option for Ella's Bubbles shower installations. These wall kits…used in 9 guides
 ▶0:20Upgrade Your Bathroom With Custom Engraved Shower WallsElla's new CNC-Engraved Acrylic Wall Kit transforms your bathroom with one-of-a-kind patterns. This kit features a 3-panel configuration…used in 2 guides
 ▶0:23Slip-Resistant, Strong Shower Bases - Built to LastElla's Bubbles SMC shower bases offer slip-resistant, reinforced strength for bathroom remodels. These durable bases are engineered for…used in 2 guides
 ▶1:02Installing a Waterfall Tub Faucet For Your Walk-In Tub (Is It Worth It?)Installing a Waterfall Tub Faucet for an Ella's Bubbles walk-in tub involves wall-mounting a brass faucet with a 24-inch slider bar and…used in 4 guides
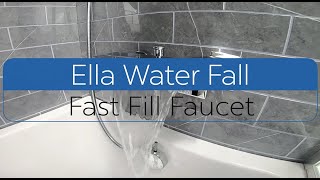 ▶1:01The Luxurious Walk-In Tub Upgrade You Need - Waterfall FaucetThe Ella waterfall fast-fill faucet delivers water in a soothing cascade, filling your walk-in tub quickly. This faucet includes an extendable…3 chapters · used in 13 guides
More Showers, Panels & Accessories videos → All videos → Watch on YouTube →
 Videos