


Installing It Yourself: What DIY Owners Must Do to Keep Support and Warranty
Updated October 2026
Yes, you can install an Ella walk-in tub yourself. Ella's Bubbles manufactures the tub and does not perform installation, so every owner chooses who does the work, whether that is a contractor, a plumber you already trust, or you. The Lifetime Limited Warranty is a parts warranty no matter who installs, and a DIY walk-in tub installation does not change that. What does matter is that the installation is done correctly: level, watertight, on dedicated GFCI circuits installed by a licensed electrician, with nothing cut or modified, and with the warranty activation form completed. Follow the steps below and you keep both your parts coverage and our free lifetime technical support.
Who Should Do It
Ella's Bubbles always recommends licensed professional plumbers and electricians for walk-in tub installations so that all local codes are followed. If you are a skilled handyman with experience doing basic plumbing and electrical work, installing an Ella walk-in tub yourself should not be a problem. There is one part that is not optional: the tub must be connected to a GFCI-protected circuit provided and installed by a licensed electrician, and a licensed electrician for your area is required to install and test the electrical installation. Even the most capable DIY owner hires an electrician for that step. Your own plumber is welcome too; any licensed installer is fine, and certification by Ella is not required. If you would rather hand the whole job to a professional, our article on finding a licensed installer explains how the team can help.
What the Job Involves
- Inspect and test on delivery. Photograph any damage, record it on the shipper's delivery document, and have the driver sign. Whenever possible, fill the tub before it goes inside to check for transit leaks. Our delivery inspection and moving guide covers this day in detail.
- Remove every panel before moving. Take off the front apron, access panels, and end panel, and lift only by the frame. The air jets on the bottom break off if the tub is dragged or set on them.
- Prepare the subfloor. It must be level and able to support the tub, the water, and the bather. Adjust the leveling legs until every leg touches the floor with equal weight. On the Standard and Zen platform the front legs are screwed into the subfloor. The leveling guide shows the procedure step by step.
- Connect the drain and the water supply. The 2 inch drain or drains connect to your house drain through the T-type ports, capping any unused port. The two included 3/4 inch by 5 foot braided supply lines connect to shut-off valves you provide near the tub. Never over-torque the supply connections.
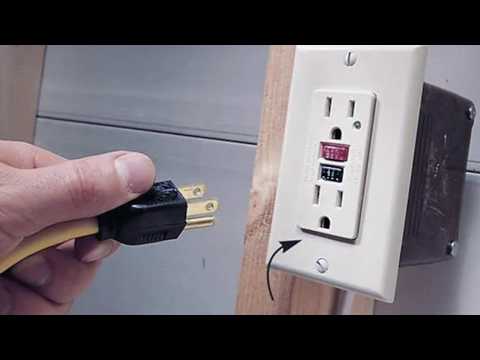
- Have the electrician install the dedicated GFCI line or lines for your package and plug in the components. No extension cords, ever. The circuit count by model and package is listed in our electrical requirements by model article.
- Run the pre-installation water test before finishing walls: fill 3 inches above the highest jet, stand 30 minutes, then run every component another 30 minutes and inspect all unions.
- Finish the walls with a tile flange and silicone caulk at all joints, as described in tile flange and wall finishing.
Chapters in this video
- 0:00 Important Installation Disclaimer This video is for educational purposes only and requires licensed contractors to follow local building codes.
- 0:16 Ella's Dual Drain Technology Ella's walk-in tubs feature dual 2-inch drains for fast, efficient drainage and overflow protection.
- 1:47 Fast Fill Faucet Sets Ella offers five-piece or two-piece fast-fill faucet sets, each with an extendable hand shower and five-foot supply lines.
- 2:18 Electrical Components And Leveling Electrical components are clearly marked and accessible, and the tub must be perfectly level before testing.
The video above is the installation guide referenced on our self-install page, and it covers the same sequence in pictures: moving the tub, leveling, connecting the drain and supply, and testing before the walls are closed. Watch: Walk-In Tub Installation Guide & Tips u2013 Easy Process with chapters and a full transcript.

Chapters in this video
- 0:00 Pre-Installation Checks and Tips Before installation, the video emphasizes checking tub dimensions, inspecting for damage, and leak-testing the tub with water.
- 1:34 Dual Drain System Installation The video demonstrates how to install Ella's exclusive dual drain system, showing various configurations and recommending a two-inch house drain.
- 3:09 Leveling and Door Alignment The technician levels the tub, ensuring proper door alignment for a leak-proof seal, and advises leaving the door unlocked when not in use.
- 3:53 Water Supply and Electrical Connections The video shows connecting fast-fill faucets with three-quarter inch supply lines and emphasizes using GFCI-protected outlets and breakers for electrical connections.
Watch: Ellas Bubbles: Walk-In Tubs Installation Tips and Recommendations with chapters and a full transcript.
The tips and recommendations video from our technical support team is the one to watch before you start. It shows how to confirm fit using actual dimensions (the Elite, listed at 30 by 52, is 29 3/4 inches wide and the Petite is 27 1/2 inches wide), how to inspect for shipping damage, why the tub is filled outside to check for transit leaks, how the four-port dual drain is connected with the unused ports capped, how to check each leveling foot with a slip of paper, why the door is left open so the gasket recovers its shape after shipping, and why 3/4 inch supply lines with shut-offs are never over-torqued. It closes with the overnight fill, the 20 minute run of air, hydro, and electrical under a flashlight, and the dedicated GFCI outlets and breakers sized to the components.
Things That Do Affect Your Warranty
- A tub that is not level, with any leg not touching the floor, can warp the frame and misalign the door, and misleveling voids the warranty.
- Installing the deck-mount grab bar without the large metal washer under the shell cracks the acrylic and voids the warranty.
- Cutting the apron or end panel, for example to recess the tub, voids coverage on the altered parts.
- Packing insulation around the pumps and electronics causes overheating and is treated as misuse.
- Running a pump before water covers all the jets causes permanent damage that is not covered.
- Improper or negligent installation, and alterations or modifications by anyone other than Ella's Bubbles, are excluded from coverage.
The full list, with the reasoning behind each item, is in installation choices that affect your warranty.
The Warranty Activation Form for DIY Owners
Activation puts your warranty in force, and the two-page form has a customer section and an installer section with a checklist the installer initials: level with all legs touching, licensed electrician, dedicated GFCI breaker, frame grounded, seal cleaned, faucet and diverters tested, supply lines checked for leaks, stoppers with locking nuts tightened, door seal watertight after a 20 minute fill, pumps run 20 minutes with connections watertight, chromatherapy and ozone working, drain fittings checked while draining, and service access retained. If you installed the tub yourself, simply use the online form at ellasbubbles.com/warranty-activation/ and put your own information in the installer field. Include a copy of your sales receipt and your electrician's license and insurance information. We recommend submitting it promptly after installation, and if it was not done at install time, you can complete it now.
How We Support You
Our technical support team provides free lifetime support by phone, email, and live video, and we are happy to talk you through any step before or during the install. If a part is ever needed, we verify the issue with photos and ship the replacement part to you; labor is never covered, so a DIY owner is in exactly the same position as an owner who hired a contractor. You can also have the tub delivered to a contractor's business address if that is easier for delivery.
Related Guides
- Does Ella Install the Tub? How to Get Connected With a Local Installer in Your Area
- What is included in a basic DIY walk-in shower kit?
- Can My Regular Plumber Install an Ella Walk-In Tub?
- How do you install a walk-in tub step by step?
- Can I buy a walk-in tub and install it myself?
Common Questions
Can I install the tub myself?
Does self-install void the warranty?
Do I need a contractor to sign the activation form?
Can my own plumber do it?
What skills do I need to install a walk-in tub myself?
Does the tub go in before or after the tile?
Which tools and materials do I need to supply?
Can I get live help while I am installing?
Who fixes something later if I installed it myself?
Have a question that depends on your exact model or configuration? Open a ticket at ellasbubbles.com/support or call (800) 480-6850 and our technical support team will be glad to help you and your installer.
About this guide. Answers in the Ella’s Bubbles Support Center are compiled from real conversations with tub owners, our technicians’ notes and the product documentation, then reviewed by our team. Tub models and options have evolved over the years, so a detail here may differ slightly from your exact tub. If something looks different on yours, send us your serial number and a specialist will confirm it for your model.
Did this solve your question?
If not, open a ticket and our team will pick it up from here.
Open a Support Ticket Videos