


Ella's Bubbles: Cartridge Replacement 5 Piece

Chapters in this video
- 0:00 Remove Handle And Collar The technician removes the colored cap, loosens the bolt with an Allen wrench, and lifts off the handle, then removes the plastic collar.
- 0:19 Remove And Clean Cartridge The technician uses a socket wrench to loosen and remove the cartridge, then checks for debris and cleans it with a soft brush.
- 0:37 Replace Cartridge And Collar The technician replaces the cartridge, tightening it without over-torquing, and then replaces the plastic collar.
- 0:51 Reattach Handle And Cap The technician puts the handle back on in the correct position, tightens the Allen bolt firmly, and replaces the colored cap.
A technician demonstrates how to replace a cartridge on an Ella 5-piece fast-fill faucet set. This video addresses issues like a dripping faucet or a stiff handle on walk-in tubs.
The process begins with removing the colored cap on the handle, then loosening the bolt with a 3-millimeter Allen wrench to lift off the handle. Next, the plastic collar under the handle is removed. This step is crucial for accessing the faucet cartridge.
Using a 17-millimeter socket wrench, the technician loosens and removes the cartridge. The cartridge is then checked for debris, foreign objects, or calcification, and cleaned with a soft brush if needed, then rinsed. This cleaning can often resolve issues with a stiff faucet handle or a faucet that drips.
The technician replaces the cleaned cartridge, tightening it without over-torquing, and then replaces the plastic collar. Finally, the handle is reattached in the correct position, the Allen bolt is tightened firmly, and the colored cap is replaced. This procedure is applicable to Ella walk-in tubs equipped with a 5-piece fast-fill faucet.
- 3-millimeter Allen wrench
- 17-millimeter socket wrench
- Soft brush
- Remove handle and collar
- Clean or replace cartridge
Step by step help for this topic: Faucet drips or the handle feels stiff: replacing your faucet cartridge step by step, 5-Piece Faucet: Water Keeps Flowing With the Valve Off, Low Pressure, Handle Replacements and Finish Options and Why Does My Tub Faucet Drip Constantly and How Do I Fix It?.
Video transcript1 paragraph · 1:10
first remove the red or blue cap on the handle using a three millimeter allen wrench loosen the bolt and then lift off the handle remove the plastic collar under the handle and then using a 17-millimeter socket wrench loosen and then remove the cartridge check for debris foreign objects or calcification if needed clean with a soft brush and then rinse replace the cartridge and tighten do not over torque replace the plastic collar put the handle back on making sure it's facing in the correct position tighten the allen bolt firmly without over torquing finally replace the colored cap
Guides that use this video
- 📖Which Ella Walk-In Tubs Come With the 2-Piece or 5-Piece Faucet?Walk-In Tub Models
- 📖Installing the Ella Fast-Fill Faucet on a Tub That Is Not an EllaShowers, Panels & Accessories
- 📖What Is a Thermostatic Control Valve and Why Does a Tub Need One?Plumbing & Electrical
- 📖Every Repair Video in One Place: Drains, Faucets, TCV, Buttons, Control Boxes, Touchpads, Doors and OzoneTroubleshooting & Repairs
- 📖5-Piece Faucet: Water Keeps Flowing With the Valve Off, Low Pressure, Handle Replacements and Finish OptionsTroubleshooting & Repairs
- 📖Why Does the Faucet Drip for a While After I Shut It Off?Troubleshooting & Repairs
- 📖Hand Sprayer Runs Hot but the Tub Spout Is Only Lukewarm: What to CheckTroubleshooting & Repairs
- 📖What size Allen wrench removes the handles on an Ella walk-in tub faucet?Troubleshooting & Repairs
- 📖How Do I Replace the Faucet Cartridge on My Walk-In Tub?Troubleshooting & Repairs
- 📖How Do I Tighten a Loose Faucet Cartridge on My Walk-In Tub?Troubleshooting & Repairs
- 📖How do I replace the faucet cartridge on an Ella walk-in tub?Troubleshooting & Repairs
- 📖What socket do I need to remove the faucet cartridge on my tub?Troubleshooting & Repairs
- 📖Faucet drips or the handle feels stiff: replacing your faucet cartridge step by stepTroubleshooting & Repairs
- 📖Leaking Diverter or Thermostatic Control Valve: Identifying Your Faucet and Ordering the Right ReplacementReplacement Parts
- 📖How to Order a Replacement Part for Your Ella Walk-In TubReplacement Parts
- 📖Replacing a Failed Thermostatic Control Valve: Cleaning First, Cartridge Versus Whole Valve, and How to OrderReplacement Parts
- 📖Can I Replace My 2-Piece Ella Faucet With the 5-Piece Set?Replacement Parts
- 📖Where Do I Get Replacement Hot and Cold Handles for My Walk-In Tub Faucet?Replacement Parts
- 📖How Do I Replace the Faucet Cartridge on My Walk-In Tub?Replacement Parts
- 📖Does the Ella Fast-Fill Faucet Hold a Set Water Temperature Automatically?Therapies & Operation
More Troubleshooting & Repairs videos
 ▶1:00The Deep Cleaning Power of Microbubbles: A Practical TestThe deep cleaning power of MicroBubble therapy in Ella's Bubbles walk-in tubs is demonstrated. The video shows the MicroBubble system in action…3 chapters · used in 2 guides
 ▶1:39Ella's Bubbles: Digital Touchpad ReplacementA technician demonstrates how to replace a faulty Ella's Bubbles walk-in tub digital touchpad. The process involves removing the old pad…4 chapters · used in 11 guides
 ▶2:46Drain Cable ReplacementA technician demonstrates how to replace a drain cable on Ella's Bubbles dual four-port t-type drains, which open and close the drains on…5 chapters · used in 8 guides
 ▶2:09Ella's Bubbles: Control Box ResetA technician demonstrates how to reset the control box for an Ella walk-in tub, showing the steps to disconnect power, locate the config switch, and…6 chapters · used in 16 guides
 ▶0:44Ella's Bubbles: Relieving Air Lock at the pump connectionRelieving an air lock at the pump connection in your Ella's Bubbles walk-in tub can resolve issues with the hydro massage pump or massage system…used in 6 guides
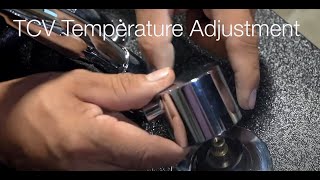 ▶1:16Ella's Bubbles: TCV Valve Temperature AdjustmentAdjusting the thermostatic control valve (TCV) on an Ella's Bubbles walk-in tub allows for hotter water. This video demonstrates how to access…3 chapters · used in 14 guides
More Troubleshooting & Repairs videos → All videos → Watch on YouTube →
 Videos