


Drain Cable Replacement

Chapters in this video
- 0:00 Introduction to Drain Cables The video introduces the dual four-port t-type drains with stainless steel cables that open and close the drains.
- 0:18 Removing the Old Cable The technician removes the service panel, armature, barrel end, drain handle, and vent assembly to access the cable.
- 1:13 Installing the New Cable The technician screws in the new cable, tightens the locking nut, and replaces the drain vent assembly with silicone.
- 1:46 Reassembling the Drain The technician places the cable barrel head onto the armature, inserts it into the connection box, and replaces the panel and drain handle.
- 2:30 Adjusting Drain Height The technician demonstrates how to adjust the drain height by turning the drain stem and tightening it with a lock nut.
A technician demonstrates how to replace a drain cable on Ella's Bubbles dual four-port t-type drains, which open and close the drains on walk-in tubs. The video also shows how to adjust the drain height.
Ella walk-in tubs feature dual four-port t-type drains with stainless steel cables. These cables, encased in a protective black plastic sleeve, are responsible for opening and closing the drains. In the rare event of a drain cable failure due to misuse, the cable can be replaced by following specific steps.
The replacement process involves removing the small service panel on the drain's connection box, carefully detaching the armature, barrel end, drain handle, and vent assembly. A new cable is then screwed in, the locking nut is tightened, and the drain vent assembly is reinstalled with a thin bead of silicone. The cable barrel head is placed onto the drain armature, inserted into the connection box, and the panel and drain handle are replaced.
The video also demonstrates how to adjust the drain height. This is achieved by turning the drain stem and tightening it with a lock nut, ensuring the fastest possible drain for your walk-in tub.
- Remove service panel, armature, barrel end
- Remove drain handle and vent assembly
- Screw in new drain cable
- Tighten locking nut
- Adjust drain stem height
Step by step help for this topic: My drain will not open or close: replacing the drain cable and adjusting drain height, Drain Plugs, Plug Stems, Drain Gaskets and Hair Catchers: Adjusting, Replacing and Keeping Them Out of the Drain and Why Won't the Drain Open When I Turn the Handle?.
Video transcript1 paragraph · 2:46
ella walk-in tubs have dual four-port t-type drains with stainless steel cables that open and close the drains the stainless steel cable comes in a protective black plastic sleeve in the rare circumstance that there's a failure with the drain cable due to misuse the cable can be replaced by following these important steps first by removing the small service panel on the connection box on the drain carefully and slowly remove the armature from the connection box remove the barrel end stepping on an open drain causes tremendous stress on the cable and could cause breakage that's why we place warning stickers on every tub before we ship them out then using an allen wrench remove one of the drain handles loosen and remove the retaining ring nut on the vent and remove the drain vent assembly completely here we see how the inner assembly works to remove the cable from the assembly simply unscrew the entire cable then replace with the new cable by screwing it in completely tighten the locking nut firmly but don't over torque replace the cover on the drain vent assembly after placing a thin bead of silicone onto the back of the assembly insert it into the drain vent hole on the tub replace the retaining ring and lock nut tighten firmly but again don't over torque place the cable barrel head end onto the drain armature and carefully insert the assembly into the connection box making sure the flat side of the cable connection is facing up here we see how the cable activates the armature and how the armature open and closes the drain via the drain stem make sure there's a positive connection between the drain stem and the armature then replace the small panel on the connection box of the drain and finally replace the drain handle making sure open enclosure is indicated by the handles being straight up and down the drain height itself is easily adjustable by simply turning the drain stem and tightening it with a lock nut assuring you of the fastest drain possible
Guides that use this video
- 📖Does a walk-in tub drain need its own vent or air admittance valve?Plumbing & Electrical
- 📖How Do I Open or Close the Drain in My Walk-In Tub?Plumbing & Electrical
- 📖Every Repair Video in One Place: Drains, Faucets, TCV, Buttons, Control Boxes, Touchpads, Doors and OzoneTroubleshooting & Repairs
- 📖Why Won't the Drain Open When I Turn the Handle?Troubleshooting & Repairs
- 📖My drain will not open or close: replacing the drain cable and adjusting drain heightTroubleshooting & Repairs
- 📖Drain Plugs, Plug Stems, Drain Gaskets and Hair Catchers: Adjusting, Replacing and Keeping Them Out of the DrainReplacement Parts
- 📖Ordering a Replacement Drain Cable or Full Drain Assembly for Your Walk-In TubReplacement Parts
- 📖Can My Local Plumber Order Ella Replacement Parts on My Behalf?Replacement Parts
More Troubleshooting & Repairs videos
 ▶1:00The Deep Cleaning Power of Microbubbles: A Practical TestThe deep cleaning power of MicroBubble therapy in Ella's Bubbles walk-in tubs is demonstrated. The video shows the MicroBubble system in action…3 chapters · used in 2 guides
 ▶1:39Ella's Bubbles: Digital Touchpad ReplacementA technician demonstrates how to replace a faulty Ella's Bubbles walk-in tub digital touchpad. The process involves removing the old pad…4 chapters · used in 11 guides
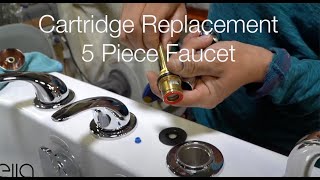 ▶1:10Ella's Bubbles: Cartridge Replacement 5 PieceA technician demonstrates how to replace a cartridge on an Ella 5-piece fast-fill faucet set. This video addresses issues like a dripping faucet or a…4 chapters · used in 20 guides
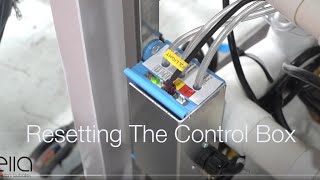 ▶2:09Ella's Bubbles: Control Box ResetA technician demonstrates how to reset the control box for an Ella walk-in tub, showing the steps to disconnect power, locate the config switch, and…6 chapters · used in 16 guides
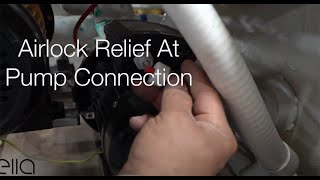 ▶0:44Ella's Bubbles: Relieving Air Lock at the pump connectionRelieving an air lock at the pump connection in your Ella's Bubbles walk-in tub can resolve issues with the hydro massage pump or massage system…used in 6 guides
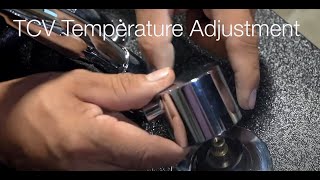 ▶1:16Ella's Bubbles: TCV Valve Temperature AdjustmentAdjusting the thermostatic control valve (TCV) on an Ella's Bubbles walk-in tub allows for hotter water. This video demonstrates how to access…3 chapters · used in 14 guides
More Troubleshooting & Repairs videos → All videos → Watch on YouTube →
 Videos