


Installing Shower Seats, Folding Benches, the Fold-Up Chair, Teak Seat, Grab Bar Shelf and the Caregiver Curtain Rod
Updated September 2026
Shower seat installation on an Ella shower always comes back to one rule: every wall-mounted seat, bench and shelf must anchor into studs or solid in-wall backing confirmed by a licensed contractor, and each product adds its own specifics. The bariatric corner seats need 2x6 backers and a bracket, the folding bench needs all four screws in every plate, the fold-up chair sits 18 to 19 inches high with silicone on the screws, the teak seat uses a location card at 16 to 19 inches, the grab bar shelf takes three screws per side, and the removable bathtub seat gets a stability test. The caregiver curtain rod mounts on brackets with silicone in every hole and must touch the floor in a barrier-free shower. Grab bars themselves and the accessory spec comparison are separate articles.
Bariatric Corner Shower Seats (rectangular and Rounded)
The rectangular seat is 26 x 14 inches with a 24 1/2 x 12 inch stainless bracket; the rounded seat is 20 3/4 x 20 3/4 inches with a 13 x 12 inch bracket. Both are permanently mounted, support up to 600 lbs, have a slip-resistant textured top, and carry a one year warranty.
- Install 2x6 backer boards horizontally between the studs at the bench height, level and centered where the bracket will go, and secure them with structural screws.
- After the wall finish is complete, mark the bracket location, pre-drill into the backer and mount the bracket with lag screws or heavy-duty fasteners.
- Set the bench on the bracket, align the mounting points and fasten with the 1/4 inch screws supplied.
- Fit the angle finish cover over the bracket edge (rectangular seat) and run silicone where the bench meets the wall.
Folding Bench with Nylon Slats
The 32 13/16 inch bench has a stainless frame, weighs about 16 1/2 lbs, is rated to 452 lbs and carries a five year warranty. Only competent, qualified installers should fit it, and the wall behind each fixing plate must be perfectly flat with no protruding joints or tiles. Use all four screws in each fixing plate: one missing or loose screw dangerously reduces the load capacity, and two or more missing means the support is not guaranteed. The supplied screws are for wood studs only; for other wall types contact the team. Re-check screw tightness periodically. Do not clean with abrasive liquids or bleach, and never dry it with hot air.
Fold-Up Shower Chair (phenolic Seat)
The 16 x 24 inch padded phenolic seat has four swing-down legs with adjustable feet, a 304 stainless base and two 3 inch wall flanges, each with three mounting holes, and meets ADA requirements.
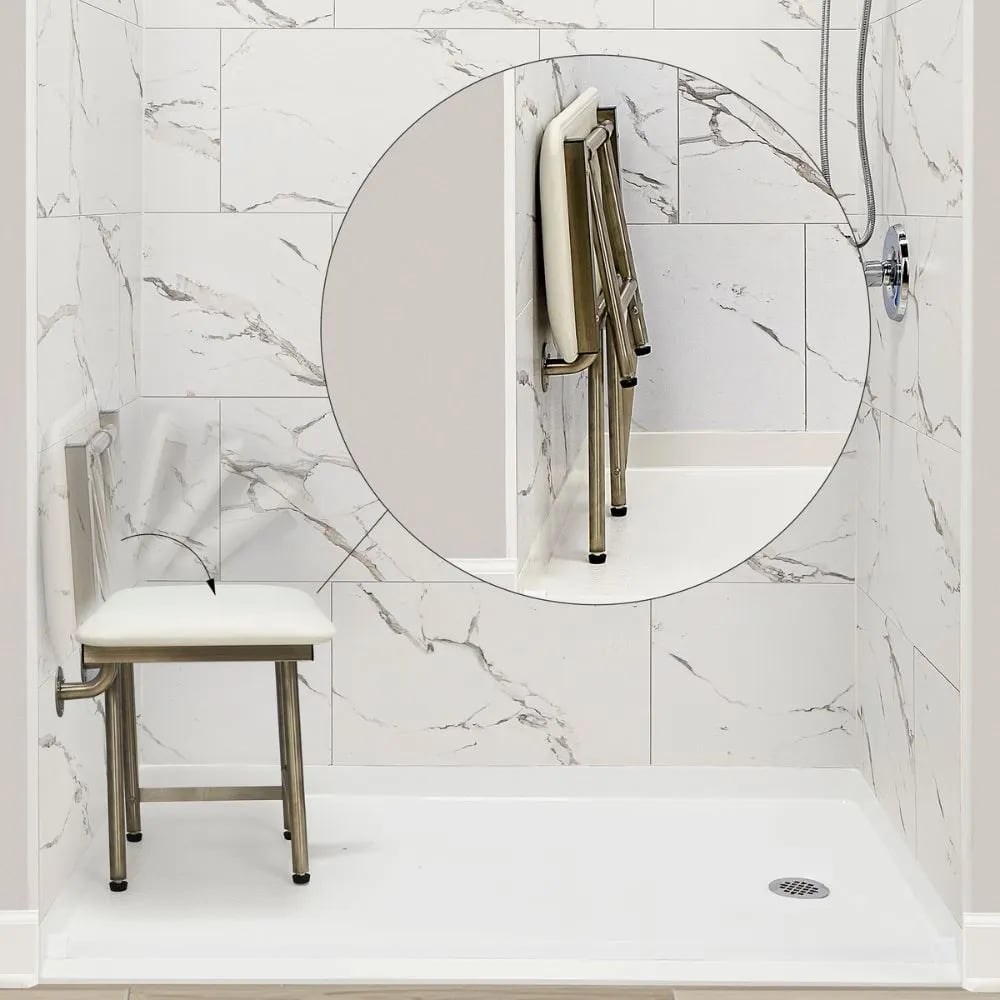
- Choose a location with proper structural support, away from pipes, wires and grout lines, and measure with the seat folded up to confirm clearance. A licensed contractor must confirm the concealed backing.
- Set the top edge of the seat, in the down position, 18 to 19 inches from the finished floor. Level it side to side, adjust the feet, and keep at least 1 1/2 inches between the seat's rear edge and the wall when it is flat.
- Mark and drill pilot holes. Apply silicone to the back of each flange in a half circle above the top screws and around each lower hole.
- Secure with the supplied screws, tight, straight and flush without over-tightening, then test by applying pressure gradually.
Folding Teak Shower Seat
The 20 x 13 inch solid teak seat folds to about 3 1/4 inches from the wall and requires stud mounting.
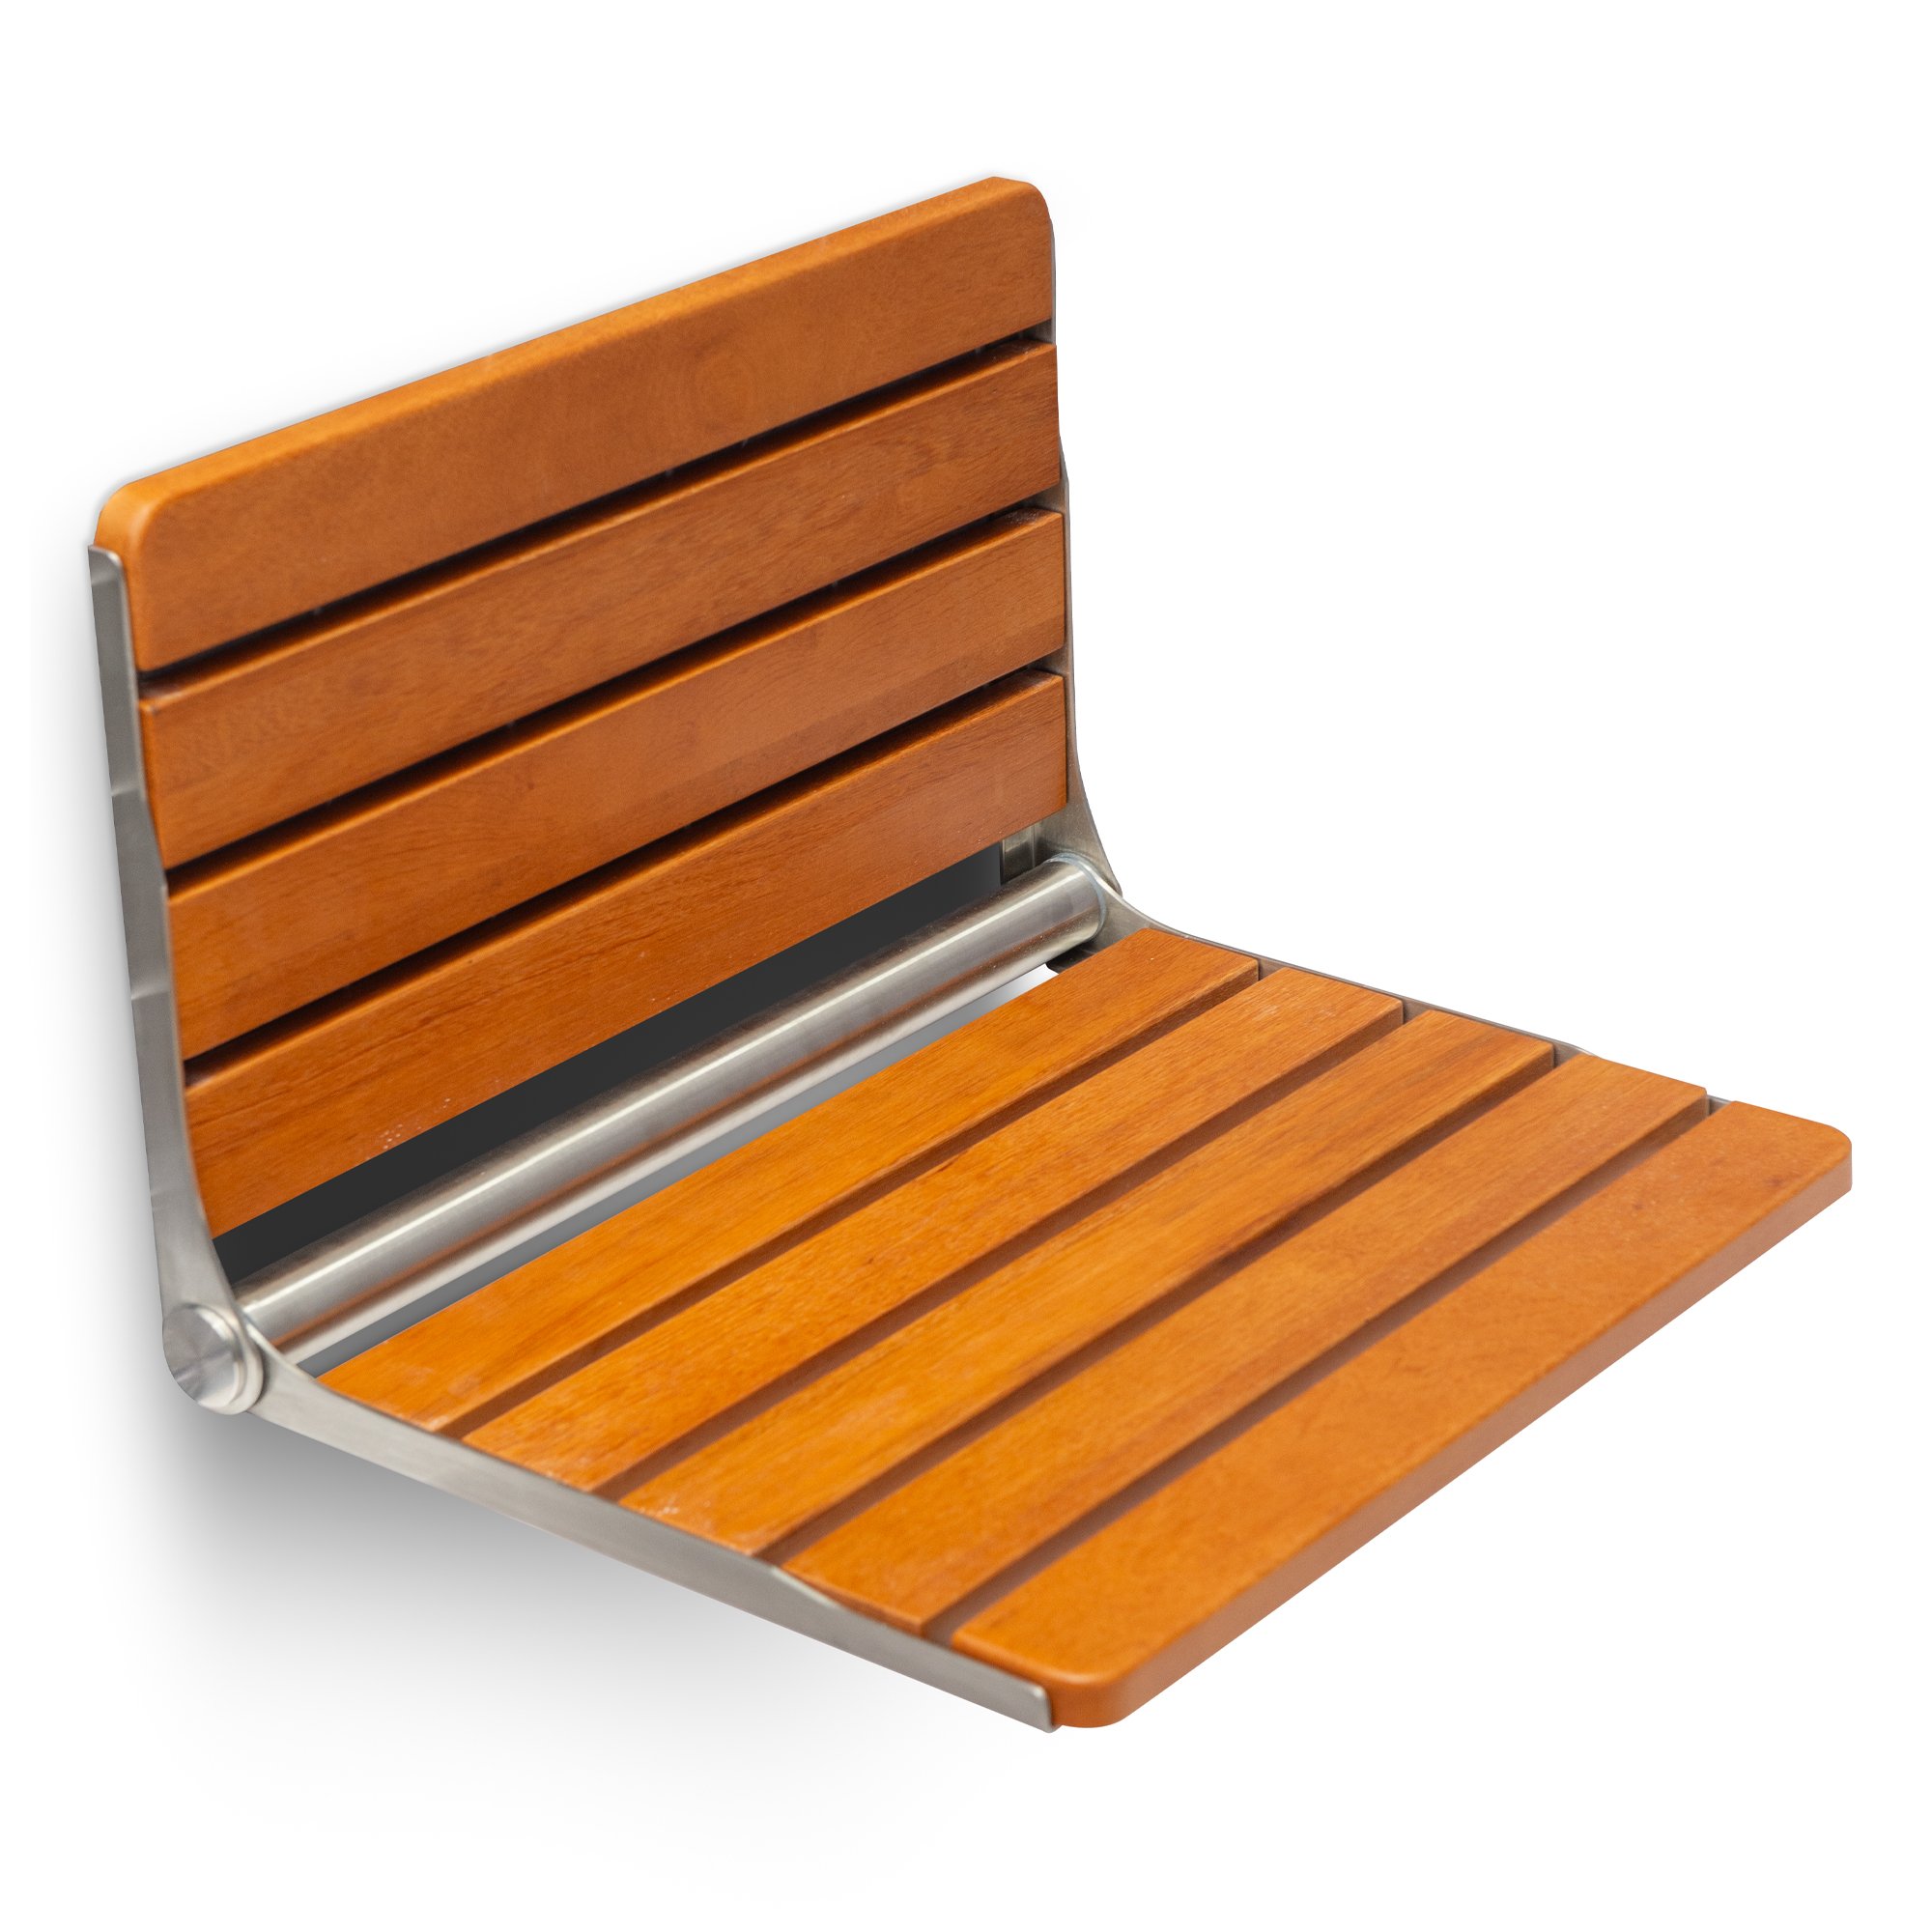
- Stick the adhesive-backed location card to the wall at the desired height, typically 16 to 19 inches from the finished floor, check it with a level and punch starter holes through the marks. A licensed contractor must confirm the in-wall backing.
- Drill the pilot holes and remove the card. Insert the wall plugs if mounting over tile; even with plugs, every screw must anchor into a stud or solid backing. Tap expansion bolts flush.
- Align the bracket and fasten with the stainless screws, firm and level without over-tightening.
- Fold the seat up and down several times, sit briefly to check stability, wipe it down and oil the teak as needed.
Grab Bar with Storage Shelf
The 18 inch, 1 1/4 inch diameter 304 stainless bar with a 14 1/2 x 4 inch shelf is rated to 300 lbs and comes in satin brushed, chrome and matte black. Locate the studs with a stud finder, or add wood blocking if the studs are not where the bar needs to be, and have the backing confirmed by a licensed contractor. Hold the bar level at the chosen height, mark, pre-drill, and install all three screws on each side into the studs or blocking. Tighten fully without over-tightening, snap on the flange covers and test by applying pressure gradually. The deck-mount bars that ship with walk-in tubs follow a different washer rule, explained in grab bars: what is included and add-on wall bars.
Removable Bathtub Seat
This seat measures 31 1/2 x 13 1/8 inches, weighs about 9 1/4 lbs, supports up to 330 lbs and adjusts in width from 25 9/16 to 31 1/2 inches to span the tub. It is intended exclusively for bathtub use. Position it carefully on the tub rims and simulate one or more stability tests, pressing down and shifting weight, before anyone uses it. Stability should be re-checked whenever it is moved.
Caregiver Shower Curtain Rod
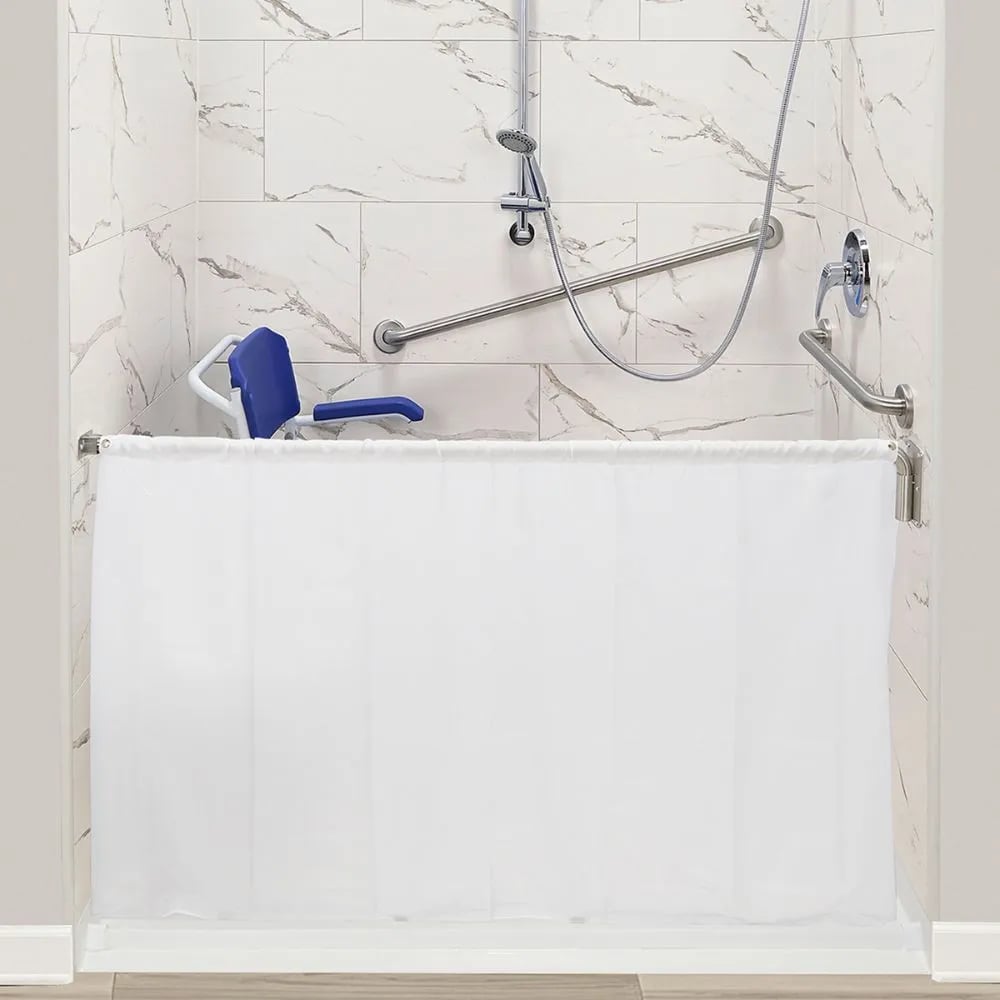
- Evaluate the wall and choose fasteners for it; screws and anchors are included. Drill a small test hole, in a grout line if the wall is tiled, and check for obstructions or uneven areas that would keep the bracket from sitting flush.
- Determine the height and location of the wall support. In a barrier-free shower the curtain must touch the floor when installed.
- Mark the drill locations and drill with a countersink bit sized to the fastener to avoid cracking tile, marble, granite, acrylic or fiberglass.
- Apply clear 100 percent silicone in a circle around each hole to keep water out of the wall cavity.
- Tighten the screws in an alternating sequence until the bracket is pressed firmly to the wall without movement.
- Insert the J-shaped end of the rod into the slot of the wall bracket.
- Twist the cap and pull to extend the telescopic rod across the opening; the extension section is tight for shipping and may need pliers.
- Place the receiver bracket beneath the point where the rod meets the opposite wall and repeat steps 1 to 5.
- Thread the top of the curtain onto the rod.
Watch: Where the Seat and Curtain Fit in a Barrier-Free Shower

Chapters in this video
- 0:00 Receiving and Inspecting Your Shower The video provides visual guidance for installing a barrier-free five-piece shower, emphasizing the importance of inspecting the unit upon arrival and noting any damage.
- 1:32 Dry Assembling Your Modular Shower The installer dry assembles the modular shower in an open space to ensure correct panels, drain location, and proper alignment before moving it to the bathroom.
- 3:04 Preparing the Framing Pocket and Subfloor The installer checks the framing pocket for proper sizing, squareness, plumb, and level, making necessary adjustments and inspecting the subfloor for integrity.
- 4:05 Installing the Shower Pan and Drain The installer cleans the pocket, dry fits and levels the pan, installs the drain body, and adheres the pan to the subfloor using silicone adhesive and bracing.
- 7:40 Assembling and Securing Shower Panels The installer places protection on the floor, caulks the pan ledge, and installs the lower and upper back panels, securing them to the studs.
- 8:31 Installing the Valve Wall and Plumbing The installer caulks the pan ledge and vertical back wall seam, sets the panel, drills holes for the valve and supply outlet, and connects the PEX supply lines.
- 11:05 Adding Accessories and Finishing Touches The installer marks, drills, and caulks around pilot holes for accessories, then caulks all seams and the front edge of the threshold, recommending a water retainer and shower curtain.
Watch this before drilling for any seat: each AcrylX panel carries steel rod supports that must be located first, the walls go on caulked pin ledges, and the tutorial ends by recommending a collapsible water retainer and a weighted curtain at the entry, exactly where the caregiver rod and the flexible shower dam go. Watch: Barrier-Free 5-Piece Low-Threshold Shower Installation u2013 Complete Tutorial with chapters and a full transcript.
Related Guides
- Does Drilling Holes for a Faucet or Grab Bars Void the Ella Warranty? Pre-Drilled Holes, Reinforced Walls and Choosing an Installer
- How High and How Big Is the Built-In Seat on an Ella Shower?
- Does Ella Offer a Dome, Ceiling Panel or Light for Its Showers?
- How Much Weight Can the Molded Shower Seat and Shower Base Hold?
- Mounting Grab Bars on Ella Shower Walls: Reinforced Backing, Finding the Zones, and Which Screws to Use
- Shower Seat Sizes and Options: Is a Larger Fold-Down Seat Available?
Common Questions
What backing goes behind a folding seat?
How high is the fold-up chair?
How many screws per plate on the folding bench?
Can I mount a seat on the acrylic wall panels of a shower kit?
How is the removable seat tested?
Can the curtain rod go on tile?
Which seat holds the most weight?
How do I care for the teak seat?
Who should install shower seats, benches, and the curtain rod?
For anything specific to your model, serial number or wall construction, open a ticket at ellasbubbles.com/support.
About this guide. Answers in the Ella’s Bubbles Support Center are compiled from real conversations with tub owners, our technicians’ notes and the product documentation, then reviewed by our team. Tub models and options have evolved over the years, so a detail here may differ slightly from your exact tub. If something looks different on yours, send us your serial number and a specialist will confirm it for your model.
Did this solve your question?
If not, open a ticket and our team will pick it up from here.
Open a Support Ticket Videos