


Installing the Shower Column Kit on Your Walk-in Tub
Updated September 2026
Shower column kit installation on an Ella walk-in tub means mounting a chrome or brushed nickel column into the hand shower hole on the tub deck, connecting it to the diverter of your Ella 2-piece or 5-piece fast fill faucet with the included 1/2 inch braided supply line, and anchoring the riser to the wall with a short or long pipe connector. Because that supply line runs to the faucet behind the tub, the deck mounted kit should be installed before the tub's final installation. This article covers the timing rule, the kit contents, the steps for both faucet sets, the wall connector choice and the sliding column alternative.
Before You Begin: Two Things You Must Know
- Install the deck kit before the tub's final installation. Because the column connects to the faucet plumbing behind the tub, the deck mounted shower column kit requires access to the back side of the tub. It must be installed prior to the final installation of your walk-in tub. If your tub is already installed in an alcove, talk to the team at (800) 480-6850 and your installer before ordering so you know whether your access panels give enough room to make the connection.
- Faucet compatibility. The shower column kit can only be installed on walk-in tubs with an Ella 2-piece or 5-piece fast fill faucet. The kit does not include the pull out hose or hand shower; it uses the hand shower and hose from your new or existing 2-piece or 5-piece faucet set. If your faucet is not yet installed, the fast fill faucet installation guide comes first.
What the Kit Includes and How It Works
- A stainless steel column, in chrome or brushed nickel, that mounts to the tub deck and connects to the faucet diverter with the included 1/2 inch stainless braided supply line.
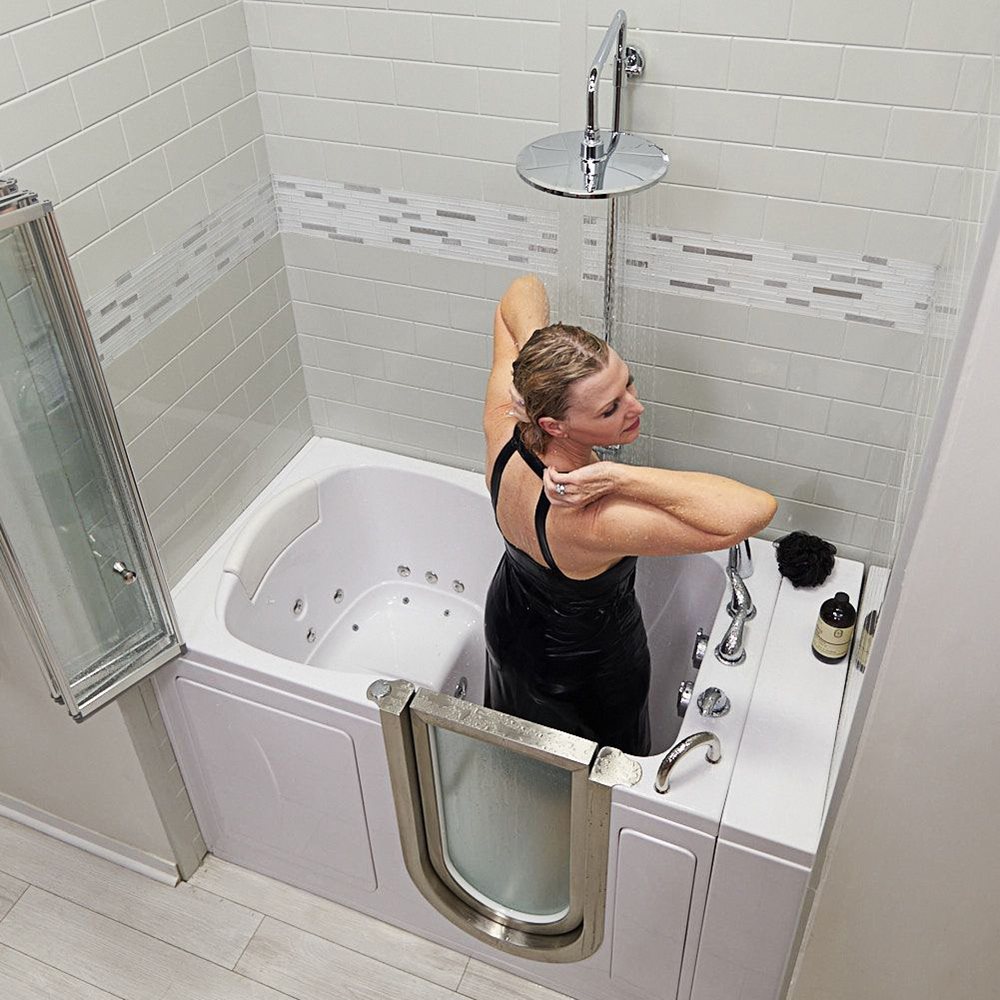
- A 10 inch pivoting rain shower head that swivels for a standing or seated shower.
- A telescoping upper section: measured from the tub deck the head adjusts from a minimum of 37 inches to a maximum of 64 inches. In a typical installation that puts the rain head at about 90 inches from the floor, a little over 7 feet, with roughly 14 inches of adjustment down to about 76 inches.
- An on and off diverter that selects the rain shower head or the pull out hand shower. Please note the two shower heads cannot spray at the same time; that is by design, not a defect.
- An adjustable height and angle bracket for the faucet's 5 mode hand shower.
Watch: Shower Column Kit Overview

Chapters in this video
- 0:00 Shower Column Kit Installation The video introduces the Ella's Bubbles shower column kit and explains that it must be installed before the walk-in tub's final installation.
- 0:22 Multi-Function Hand Shower The shower column kit features a height-adjustable, multi-function hand shower that tilts and swivels for convenience.
- 0:49 Overhead Rain Shower The diverter engages the large overhead rain shower, which pivots and swivels for maximum comfort during standing or seated showers.
- 1:07 Height Adjustment The shower column is easily height adjustable, with a maximum height of 90 inches and 14 inches of adjustment to bring it down to 76 inches.
The video shows how the kit connects to the 2-piece or 5-piece fast fill faucet: push the diverter button on the 2-piece set, or turn the diverter handle on the 5-piece set, to switch between the multi function hand shower and the overhead rain shower. Watch: Walk-In Tub & Shower Combo with Shower Column Kit: for Convenient Bathing with chapters and a full transcript.
Installing the Column Base and Riser

Chapters in this video
- 0:00 Installing the Shower Column Base The technician inserts the shower column base into the pre-drilled hole and secures it with washers and a locking collar.
- 0:37 Attaching the Riser Tube The technician screws the riser tube onto the shower base unit, ensuring the gasket is correctly placed.
- 0:50 Connecting the Shower Supply Line The technician connects the shower supply line to the bottom of the base unit and then to the diverter.
- 1:13 Adjusting the Riser Arm Bracket The technician adjusts the riser arm bracket to accommodate various wall configurations and places the rubber gasket.
- 2:04 Mounting the Shower Column The technician attaches the mounting brackets to the shower wall, ensuring the unit is perfectly level.
- 2:22 Attaching Rain and Hand Showers The technician attaches the rain shower to the riser tube and the hand shower to the unit with a flexible hose.
Watch: Ella's Bubbles Shower Column Installation With A 5 Piece Faucet Set with chapters and a full transcript.
- Remove the hand shower receptacle to expose the pre drilled hole in the tub deck.
- Remove the rubber washer, metal washer, and locking collar from the base unit. Apply a small amount of silicone, insert the base into the hole, reattach the washers and locking collar, and tighten the set screws without over torquing.
- Set the height of the column base. We recommend 7 inches.
- Check that the gasket is seated correctly, then screw the riser tube onto the base. Hand tighten, then add one quarter to one half turn with a wrench.
- Connect the 1/2 inch shower supply line to the bottom of the base unit, tighten the same way, then attach the other end to the faucet diverter.
- Fit the lower and upper mounting brackets. The bracket depth adjusts with an Allen wrench to suit your wall, up to 2 1/2 inches out or 1 3/8 inches in, and the rubber gasket goes into the mounting plate before attaching.
- Make sure the column is perfectly level and vertical, then attach the mounting brackets to the shower wall.
- Attach the rain shower head to the riser tube. Attach the adapter nut to the column, connect the flexible hand shower hose, hand tighten plus one quarter to one half turn, and place the hand shower in its holder.
Installing with the 2-Piece Faucet Set

Chapters in this video
- 0:00 Install Shower Column Base The technician removes the hand shower and installs the shower column base unit into the pre-drilled hole.
- 0:40 Connect Shower Column Feed Line The technician connects the shower column feed line to the bottom of the shower column and the faucet.
- 1:14 Install Riser Tube And Wall Mount The technician installs the riser tube and secures the brass wall mount with a chrome collar and gasket.
- 1:33 Attach Upper Mounting Bracket The technician attaches the upper mounting bracket, ensuring the shower riser is vertical, and inserts the column's mounting arms.
- 1:54 Connect Hand Shower Hose The technician attaches the adapter nut to the shower column and connects the hand shower hose to the adapter nut.
The process is the same, with these specifics: place a bead of silicone at the base, insert the base unit into the vacant pre drilled hole, and set a height of about 7 inches from the tub deck to the middle of the diverter switch. Insert the rubber gasket, then the metal washer, screw on the metal locking collar, and tighten the set screws firmly without over torquing. Route the shower column feed line from the bottom of the column to the brass connection on the faucet, hand tighten, then snug each connection one quarter to one half turn. The brass wall mount adjusts and locks with an Allen wrench; slide the chrome collar and rubber gasket onto each mounting arm before setting the brackets, and verify the riser is exactly vertical before final mounting.

Chapters in this video
- 0:00 Prepare Shower Column Base The technician removes the screw collar, metal washer, and rubber washer from the shower base assembly.
- 0:18 Install Shower Column Base Silicone caulk is applied to the metal collar and rubber gasket, then the shower column base is placed into the tub deck.
- 0:36 Secure Shower Column Base The metal washer and screw collar are placed on the underside of the base and tightened, then the allen screw is set.
- 1:02 Connect Shower Hoses The brass fitting is attached to the shower hose and inserted into the faucet receptacle, then the elbow extension is attached.
- 1:43 Attach Shower Components The handheld shower line and handheld shower are attached, followed by the shower column extension arm and oversized rain shower head.
- 2:12 Mount Shower Column Holes are drilled for mounting brackets, which are then secured to the shower wall and the shower head riser.
- 2:31 Adjust Shower Heads The shower column is now secure, and the handheld shower and rain shower head can be adjusted for position and height.
The clip above shows the same installation from a second angle.
Installing with the 5-Piece Faucet Set

Chapters in this video
- 0:00 Introduction to Walk-In Tub The video begins with an overview of the Ella's Bubbles walk-in tub, highlighting its features and design.
- 0:23 Installation of Shower Column A technician demonstrates the process of installing the shower column kit, ensuring proper alignment and secure fitting.
- 1:00 Connecting the Faucet System The video shows how to connect the five-piece faucet system to the walk-in tub, detailing each step for a secure connection.
- 1:49 Final Adjustments and Testing The technician makes final adjustments to the tub and tests the water flow and drainage to ensure everything is working correctly.
With the 5-piece set the supply line lands on the diverter body between the hot and cold handles, and the diverter handle, rather than a push button, selects the outlet. Everything else is identical. Watch: Ellas Bubbles - Walk In Bathtub Shower Column Kit Install With Five Piece Faucet with chapters and a full transcript.
Choosing the Right Wall Pipe Connector
The column anchors to the wall with either a short or a long pipe connector, and for added safety the rail is screwed to the wall.
- Short connector, adjustable 2 1/4 to 3 1/4 inches: used when the column attaches directly to the wall.
- Long connector, adjustable 4 to 5 inches: used when your tub has the extension panel or filler kit in a three wall alcove installation.
Getting a Water-Tight Seal at the Deck
Chapters in this video
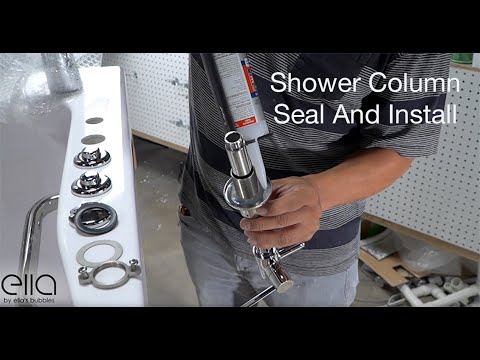
- 0:00 Prepare Shower Column Base The technician removes the locking piece and all gaskets from the shower column base.
- 0:17 Apply Silicone Caulk The technician applies a thin bead of silicone caulk where the attachment ring meets the thread.
- 0:52 Install Column Base The technician places the column base into the pre-drilled hole and secures it with the metal washer and locking piece.
- 1:14 Tighten Screws Securely The technician tightens each screw snugly, ensuring a secure and watertight seal for the shower column base.
The video shows how the silicone bead, gasket, washer and locking collar seal the deck hole. If water ever appears under the tub near the column, check this joint and the supply connections first, as described in water under or behind the tub. Watch: Shower Column with Water-Tight Seal for Walk-In Tubs with chapters and a full transcript.
Alternative: The Wall Mounted Sliding Shower Column

Chapters in this video
- 0:00 Marking Drill Holes For Brackets The technician determines the shower column placement and marks the drill holes for the lower and upper brackets.
- 0:28 Securing Column To Wall The technician slides the chrome cover over the lower bracket, places the column, and secures the upper bracket to the wall.
- 0:59 Attaching Shower Head Coupler The technician removes the shower head, attaches the coupler and extension line, and feeds the excess line into the receptacle.
- 1:30 Reattaching Shower Head The technician reattaches the shower head, places it into the holder, and demonstrates the holder's adjustability.
Watch: Ella's Bubbles: Installing the Wall Mounted Sliding Shower Column with chapters and a full transcript.
- Choose the column location, check level, and mark the lower bracket hole. Drill, insert the anchor, tap it flush, drive the shorter screw, and slide the chrome cover over the bracket.
- Place the column into the lower bracket. Before securing the top, place the shower head holder onto the column and slip the upper bracket over the column.
- Mark and drill the upper hole, insert the anchor, and drive the longer screw through the hole provided in the column. Slide the chrome cover over the bracket.
- Remove the shower head, attach the coupler, attach the extension line, hand tighten, and feed the excess line into the receptacle. The coupler and rubber washer create the waterproof seal at the receptacle.
- Reattach the shower head and place it in the holder, which adjusts in height and pivots side to side.
Important: overextending the handheld shower without the extension line and coupler installed creates a leak hazard, so never skip those two parts. The slider bar and extension coupler article explains why in detail.
Related Guides
- What Is the Shower Column Kit on a Walk-In Tub?
- Can I Add a Hand Shower Slide Bar or Rain Shower Column After My Tub Is Installed?
- How Tall Is an Ella Walk-In Tub, With and Without a Shower Column?
- Does a Walk-In Tub Come With a Shower Head? Riser, Column and Rain-System Options for a Standing Shower
- Can I Add a Ceiling Light Above an Open-Top Ella Shower?
- Can you add a shower to a walk-in tub?
Common Questions
Can the shower column kit be added after my tub is installed?
The video says 7 inches above the deck. Can I set the base higher?
Can the rain head and the hand shower run at the same time?
Which wall connector do I use?
Does the kit include the hand shower?
My kit is missing the long pipe connector or a bracket. What do I do?
Will the column fit a walk-in tub from another brand?
The column drips after I shut the water off. Is something wrong?
Still need help? Our team is always happy to assist. Open a ticket at ellasbubbles.com/support or call us at (800) 480-6850.
About this guide. Answers in the Ella’s Bubbles Support Center are compiled from real conversations with tub owners, our technicians’ notes and the product documentation, then reviewed by our team. Tub models and options have evolved over the years, so a detail here may differ slightly from your exact tub. If something looks different on yours, send us your serial number and a specialist will confirm it for your model.
Did this solve your question?
If not, open a ticket and our team will pick it up from here.
Open a Support Ticket Videos