


How is a walk-in tub installed and what does the process involve?
An Ella walk-in tub is installed by a licensed local contractor, usually a plumber and an electrician, who confirm the fit, inspect and test the tub, set it perfectly level on its adjustable legs, connect the water supply, the drain and a dedicated GFCI protected circuit, then fill and run it to prove the door seal and every connection are watertight before the access panels go back on. Ella's Bubbles manufactures the tub and does not send installers or technicians, as Does Ella's Bubbles install walk-in tubs, and how do I find an installer? explains, but your contractor receives free lifetime technical support by phone, email and live video, along with the installation manual, spec sheet and electrical diagrams for your model. This page lays the process out stage by stage so you know what to expect on the day and what to check afterward.
Before the Tub Arrives
Installation starts before delivery, with making sure the tub will fit. Use the actual dimensions printed on your model's spec sheet rather than the nominal size in its name, and measure the doorways and hallways the crate must pass through, because a crated tub is larger than the tub itself. Then line up the two trades the job needs. The plumber brings the hot and cold supply and the drain to the tub, sets it and makes the connections. The electrician handles the circuit, and because the amperage the tub needs depends on the number and type of components in your therapy package, the electrical diagrams for your model go to the electrician ahead of time. Two planning points are easy to miss:
- Shut-off valves are not included with the tub. Plan for easy-to-reach valves so the supply can be isolated later without pulling panels.
- Your tub was drilled for the faucet and the features you chose at order, and it was assembled and tested in Chicago before it was packed. The video on this page shows that factory test, with each tub sitting full of water and its jets running before it is drained and shipped. Your installer repeats a version of that test in your bathroom.
Delivery Day: Inspect Before Anything Is Installed
Treat the delivery as your inspection point. Freight damage must be reported within 48 hours of receipt, so open the crate, photograph the packaging, the crate and the tub, note any damage on the bill of lading and have the driver sign next to your note. If the crate cannot be fully opened at the curb, the words subject to further inspection on the delivery document keep your inspection open. Save every piece of packaging until the tub has been filled and run. Can I install my walk-in tub while a freight damage claim is pending? explains why the order of events is inspect, document, report and only then install, and when a pending claim should pause the work.
Check the parts box packed inside the crate as well. The door handle and the deck-mount grab bar ride loose in that box and are not installed when the tub ships, which Removing Grab Bars, the Door Handle and Controls for Custom Plating or Refinishing describes, so a missing handle on delivery day is usually still in the box rather than a missing part. Wherever possible, fill the tub with water before it is brought inside to check for leaks, and recheck every air, hydro and electrical connection, since a problem found at this stage is far easier to resolve than one found after the tub is set in place.
Setting and Leveling the Tub
Once the tub is in the alcove, it must sit perfectly level with every support leg touching the floor. The frame has adjustable leveling legs for this, and the installer works around the tub adjusting each one until the rim reads level in both directions and no leg hangs free. Leveling is not cosmetic. The door is engineered to close against its gasket with the shell in its designed shape, so a tub that rocks or sits twisted can show a door that does not align or a seal that weeps. Before any water goes in, the installer confirms the door is perfectly aligned in its opening, opening and closing it several times and checking that the latch engages cleanly. Removable access panels on the tub give the installer a way to reach the frame, the pumps and the connections while this work is done.
Plumbing and Electrical Connections
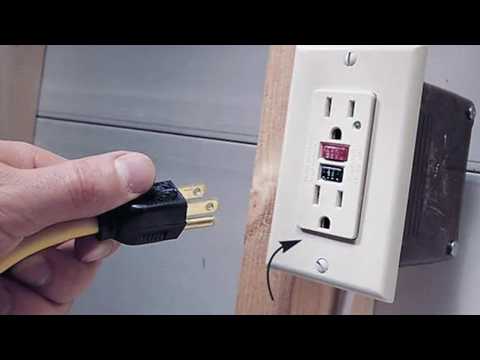
With the tub level, the plumber connects the supply to the faucet and the drain to the house line, and the electrician brings power to the control box. The electrical rules are firm. The tub must be installed on a dedicated GFCI protected circuit breaker, the frame must be properly grounded, the tub cannot share a circuit with any other appliance, and the breaker box must use GFCI protected breakers. Ella marks all electrical components clearly and keeps them easily accessible behind the access panels, and the pumps, heaters and other components are certified. The control box has a green LED power indicator, so once the circuit is live the electrician can confirm at a glance that power is reaching the box, a check that Pump or Massage System Not Working: Connections, Relay Switch, and What to Check First uses as the first step in any later troubleshooting.
Filling and Testing
- Clean the door seal with rubbing alcohol so the gasket meets the shell with nothing between them.
- Close and latch the door, fill the tub, and leave it filled for at least 20 minutes while checking that the seal stays watertight all the way around.
- Confirm the water is above the highest jets before any pump is started. The tub is designed to run only when the jets are submerged, and running a pump dry causes permanent damage.
- Run the hydro and air pumps for at least 20 minutes and check that every pump and jet connection is watertight while the systems are under load.
- Open the drain and watch the tub empty, checking the drain and overflow connections for any weeping.
If anything leaks or fails to run during this test, this is the moment to resolve it, with the panels still off and the installer on site. Your contractor can reach the technical support team at (800) 480-6850 or through ellasbubbles.com/support with your model name and serial number.
Finishing Up and Putting the Warranty in Force
The tub is finished with access kept to both the plumbing and the electrical connections, so the removable panels stay removable and nothing is tiled or framed over them. Then the warranty activation form, a two-page document, is completed and signed by both you and the installer and returned to Ella's Bubbles. Activation is required to put the warranty in force, so do not let it wait. From this point the two halves of the job are covered separately: the labor is warranted by the contractor who performed it, and the product is covered by Ella's Bubbles, which ships replacement parts under the warranty rather than sending a crew. Keep your model name and serial number where you can find them, and if a question comes up later, the team at (800) 480-6850 is glad to help you or your installer with it.

Watch: Luxury Walk-In Tubs Assembled & Quality-Tested in Chicago | Voted Best/Safest 2020 | Ella’s Bubbles with chapters and a full transcript.
Related Guides
- Installation Documents for Your Contractor: Spec Sheets, Electrical Diagrams, Manuals and the Live Video Session
- Electrical requirements by model: dedicated GFCI circuits for your walk-in tub
- What Size Water Heater Do I Need for My Walk-in Tub?
Related Videos


Common Questions
Does Ella's Bubbles send someone to install my walk-in tub?
Why does the installer fill the tub before bringing it inside?
What kind of electrical circuit does a walk-in tub need?
How long should the tub stay filled during the installation test?
Who signs the warranty activation form after installation?
Are shut-off valves included with the walk-in tub?
About this guide. Answers in the Ella’s Bubbles Support Center are compiled from real conversations with tub owners, our technicians’ notes and the product documentation, then reviewed by our team. Tub models and options have evolved over the years, so a detail here may differ slightly from your exact tub. If something looks different on yours, send us your serial number and a specialist will confirm it for your model.
Did this solve your question?
If not, open a ticket and our team will pick it up from here.
Open a Support Ticket Videos