


Ella's Bubbles: 4 Fold Glass Door Installation Video

Chapters in this video
- 0:00 Unpack and Prepare the Screen The video begins by showing how to carefully unbox and unwrap the four-fold glass shower screen, recommending setting it on the floor bottom side up.
- 0:27 Install Wall Channel and Gasket The technician measures and marks the wall channel position, drills holes, inserts anchors, and then places the gasket into the bottom channel of the shower screen.
- 1:20 Secure End Caps and Knobs The technician removes a screw, places the end cap molding, secures it, draws the gasket through, inserts seal end caps, trims excess, and places chrome knobs.
- 2:08 Adjust Screen Height and Level The screen is placed onto the channel to determine the proper height and level, which is critical for the correct function of the bottom gasket.
- 2:39 Final Secure and Seal The technician marks and drills holes, re-secures the door to the wall channel, attaches decorative screw snap caps, and applies a thin bead of silicone caulk.
A technician demonstrates the installation of the Ella's Bubbles four-fold glass shower screen, covering unpacking, wall channel placement, gasket insertion, end cap and knob attachment, and final sealing.
The Ella's Bubbles four-fold glass shower screen installation begins with carefully unboxing and unwrapping the screen, recommending it be set on the floor bottom side up. The technician then measures and marks the wall channel position, drills holes, inserts anchors, and tightens screws, leaving a slight lag before hand-tightening the final turns to avoid over-torquing. Next, the gasket is placed into the bottom channel of the shower screen, with a recommendation to use silicone lubrication if needed, and excess material is noted for later trimming.
The video continues by showing how to remove a screw, place the end cap molding, and secure it using the same screw. The gasket is drawn through the end cap, and seal end caps are inserted on both sides to anchor the gasket. Excess gasket material is trimmed, and chrome knobs are placed onto the glass screen, ensuring rubber gaskets are in place and tightened firmly without over-torquing. The screen is then placed onto the channel to determine the proper height and level, which is critical for the correct function of the bottom gasket; if the door is too low, it will damage the gasket, and if too high, it will cause a leak. The gasket should brush the tub deck lightly and evenly, and the door can be adjusted within the wall channel to compensate for walls that are not square.
For the final steps, the technician marks and drills holes through the pre-drilled holes on the wall channel, then re-secures the door to the wall channel using screw snap cap bases. Decorative screw snap caps are attached, and hinge screw caps are snapped onto the top of the screen. A thin bead of silicone caulk is applied between the wall channel and the wall to prevent leaks, ensuring the horizontal gasket rests evenly on top of the tub deck for a proper seal.
- Unpack and unwrap the four-fold glass shower screen
- Install wall channel and gasket
- Secure end caps and chrome knobs
- Adjust screen height and level
- Apply silicone caulk
Step by step help for this topic: Installing Glass Shower Screens: Four-Fold and LayDown Screens, Replacement Parts for Glass Shower Screens and Doors: Gaskets, Glass Panels, Silicone Protectors and How Doors Ship and Why Does My Shower Screen Gasket Have a Gap and Spray Water?.
Video transcript1 paragraph · 3:36
here's some installation tips on how to install the Ella four-fold glass shower screen unpack your glass screen carefully and make sure all parts are accounted for carefully unbox and unwrap the screen we recommend setting the screen on the floor bottom side up at this point measure where your wall channel will be positioned measure carefully and set it at perfect level Mark the drill holes drill carefully insert and tap in anchors and then carefully tighten the screws making sure to leave a little lag and then hand tighten the final few turns making sure not to over torque place the gasket into the channel at the bottom of the shower screen if needed use a little silicone lubrication to help it slide in the gasket is longer than the door so there will be excess material that will be cut later leave 75 millimeters out at the wall end cut as seen here tie a knot with a loose end and place that knot into the space in the plastic Corner this will anchor the gasket remove the screw at the opposite bottom front side of the screen pull the gasket down the channel away from the open end of the door so you can place the end cap molding onto the vacant space and using the same screw secure the end cap molding the end caps are all included in the parts and accessories bag draw the gasket through the end cap insert one half of the seal end cap on one side of the gasket and then do the same on the other side this will anchor the gasket on the open side of the door glue both end cap and seal cap onto the molding and then trim the excess gasket place the Chrome knobs onto the glass screen making sure the rubber gaskets are in place tighten firmly but don't over torque at this point you can place the screen onto the channel to determine the proper height and the proper level proper height and level is critical for the correct function of the bottom gasket if the door is too low it will damage the gasket if the door is too high it will cause a leak the gasket should brush the tub deck lightly and evenly the door can be adjusted to compensate for bathroom walls that might not be square by simply moving the door inside the wall Channel foreign perfect height and level Mark the drill holes through the pre-drilled holes on the wall Channel drill the holes as marked and then re-secure the door onto the wall Channel using the screw snap cap bases attach the door to the channel tighten securely but don't over torque attach the decorative screw snap caps the final result should look like this finally snap on the hinge screw caps on the top of the screen a thin bead of silicone caulk must be placed between the wall Channel and the wall to prevent leaks the horizontal gasket should rest evenly on top of the tub deck creating a nice seal
Guides that use this video
- 📖Installing Glass Shower Screens: Four-Fold and LayDown ScreensShowers, Panels & Accessories
- 📖Why Does My Shower Screen Gasket Have a Gap and Spray Water?Showers, Panels & Accessories
- 📖Which Glass Shower Screen Fits Your Ella Tub and Where It MountsShowers, Panels & Accessories
- 📖Is There a Lock on the Walk-In Tub Door, and How Do I Stop Hand-Shower Splashing?Showers, Panels & Accessories
- 📖What Is a Shower Screen on a Walk-In Tub, and Do You Need One?Showers, Panels & Accessories
- 📖How Do You Fit a Folding Shower Screen on a Walk-In Tub?Showers, Panels & Accessories
- 📖How Do I Fix a 4-Fold Shower Screen That Leaks or Will Not Fold Flat?Showers, Panels & Accessories
- 📖How Do I Replace the Bottom Gasket on an Ella Glass Shower Door?Showers, Panels & Accessories
- 📖What is a shower screen, and how is it different from a door?Showers, Panels & Accessories
- 📖How Do You Install a Folding Glass Shower Screen Over a Walk-In Tub?Showers, Panels & Accessories
- 📖How Reliable Is a Walk-In Tub With a Glass Shower Wall?Showers, Panels & Accessories
- 📖Do You Sell Folding Glass Shower Screens for a 60 Inch Walk-In Tub?Showers, Panels & Accessories
- 📖How Do You Fit a Folding Bath Screen on a Walk-In Tub?Showers, Panels & Accessories
- 📖How Do I Install a Folding Shower Screen Over a Walk-In Tub?Showers, Panels & Accessories
- 📖Can I Remove the Interior Grab Bar, and Is There Anything to Cover the Holes?Installation & Leveling
- 📖Replacement Parts for Glass Shower Screens and Doors: Gaskets, Glass Panels, Silicone Protectors and How Doors ShipReplacement Parts
More Showers, Panels & Accessories videos
 ▶2:19How to Cut Acrylic Shower Wall Panels Safely | Ella’s Bubbles Cutting GuideCustomers learn how to cut acrylic shower wall panels safely for Ella's Bubbles walk-in tubs. This video provides a cutting guide for acrylic…used in 15 guides
 ▶1:09CNC Engraved Patterns in Acrylic Wall KitsCNC engraved patterns are shown on acrylic wall kits, offering a decorative option for Ella's Bubbles shower installations. These wall kits…used in 9 guides
 ▶0:20Upgrade Your Bathroom With Custom Engraved Shower WallsElla's new CNC-Engraved Acrylic Wall Kit transforms your bathroom with one-of-a-kind patterns. This kit features a 3-panel configuration…used in 2 guides
 ▶0:23Slip-Resistant, Strong Shower Bases - Built to LastElla's Bubbles SMC shower bases offer slip-resistant, reinforced strength for bathroom remodels. These durable bases are engineered for…used in 2 guides
 ▶1:02Installing a Waterfall Tub Faucet For Your Walk-In Tub (Is It Worth It?)Installing a Waterfall Tub Faucet for an Ella's Bubbles walk-in tub involves wall-mounting a brass faucet with a 24-inch slider bar and…used in 4 guides
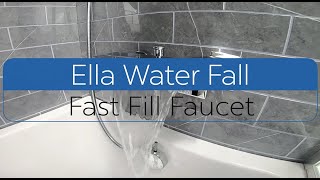 ▶1:01The Luxurious Walk-In Tub Upgrade You Need - Waterfall FaucetThe Ella waterfall fast-fill faucet delivers water in a soothing cascade, filling your walk-in tub quickly. This faucet includes an extendable…3 chapters · used in 13 guides
More Showers, Panels & Accessories videos → All videos → Watch on YouTube →
 Videos