


How To Install a Walk-In Tub Door Seal (Step-By-Step)

Chapters in this video
- 0:00 Replacing a Walk-In Tub Gasket Replacing your walk-in tub door gasket is a simple process that ensures a watertight fit.
- 0:19 Applying Adhesive Remover The technician sprays adhesive remover onto the gasket to help it slide easily into the door channel.
- 0:35 Making Relief Cuts The technician uses diagonal cutters to make V-shaped relief cuts on the gasket at the curved sections of the door.
- 1:02 Inner Curve Cuts For the inner curves where the door bends inward, the technician makes straight vertical cuts.
- 1:21 Finishing the Gasket Installation The technician makes a small angled cut at the end point so the gasket slightly overlaps and is fully inserted into the groove.
Replacing an Ella's Bubbles walk-in tub door gasket is a simple process that ensures a watertight fit. This video provides a step-by-step guide for installing a new walk-in tub door seal.
Replacing your walk-in tub door gasket is easier than it looks with the right tools and a few well-placed cuts. The video demonstrates how to spray adhesive remover onto the gasket to help it slide easily into the door channel. A spatula is used to gently press the gasket into the groove until it is fully seated.
For the curved sections of the walk-in tub door, the technician uses diagonal cutters to make V-shaped relief cuts on the gasket where it bends around the outer edge. For the inner curves where the door bends inward, straight vertical cuts are made. The process continues with applying adhesive remover and guiding the gasket into place.
At the end point of the gasket installation, a small angled cut is made so that the tip of the gasket slightly overlaps but is fully inserted into the groove. This step-by-step tutorial is designed for professional installers and walks through the entire gasket replacement process for Ella’s Bubbles walk-in tubs.
- 1½"-2" spatula
- Diagonal cutters
- Goo Gone (adhesive remover)
- V-shaped relief cuts
- Straight vertical cuts
Step by step help for this topic: Caring for Your Door Seal: Cleaning, Reseating, and Replacing the Gasket, Door seal or gasket looks worn, loose, or leaks: care, repair, and replacement and Video Guide: Installing a Replacement Door Seal, Including the LayDown Glass Door.
Video transcript2 paragraphs · 1:46
Replacing a LS bubbles walk in tub door gasket is easier than it looks. With the right tools and a few wellplaced cuts, you'll have a perfect watertight fit. Spray adhesive remover onto the gasket to help it slide more easily into the door channel. Using the spatula, gently press the gasket into the groove until it is fully seated. At the curved sections of the door, use the diagonal cutters to make four V-shaped relief cuts on the gasket where it bends around the outer edge.
Be sure to make the cuts above the gasket reach line as shown in the video. For the inner curves where the door bends inward, make straight vertical cuts. Continue applying adhesive remover and guiding the gasket into place with the spatula until you reach the end. At the end point, make a small angled cut so that the tip of the gasket slightly overlaps but is fully inserted into the groove. Hey, hey, hey.
Guides that use this video
- 📖Common Questions About Walk-In Tub Door SealsPorte et joint
- 📖Video Guide: Installing a Replacement Door Seal, Including the LayDown Glass DoorPorte et joint
- 📖Every Ella Door Video in One Place: Seals, Handles, Latches, Alignment and Replacement by Door FamilyPorte et joint
- 📖Why Does the Door Gasket Pop Out Every Time I Shut the Door?Porte et joint
- 📖Replacing a Leaking Door Seal: Torn Seal or Door Alignment, Warranty Coverage, and How the Seal ShipsPorte et joint
- 📖Do walk-in tub doors leak, and how are they sealed?Porte et joint
- 📖Which Silicone Should I Use to Reseat a Walk-In Tub Door Gasket?Porte et joint
- 📖Which Silicone Should I Use to Reseat a Walk-In Tub Door Gasket?Porte et joint
- 📖Which Silicone Should I Use to Reseat a Walk-In Tub Door Gasket?Porte et joint
- 📖Which Silicone Should I Use to Reseat a Door Gasket?Porte et joint
- 📖Caring for Your Door Seal: Cleaning, Reseating, and Replacing the GasketPorte et joint
- 📖Door seal or gasket looks worn, loose, or leaks: care, repair, and replacementPorte et joint
- 📖Every Repair Video in One Place: Drains, Faucets, TCV, Buttons, Control Boxes, Touchpads, Doors and OzoneDépannage et réparations
- 📖Caring for your walk-in tub door seal so it stays watertight for yearsEntretien et nettoyage
- 📖Is the Door Seal Still Covered Under Warranty on My Older Ella Tub?Garantie et enregistrement
More Door & Seal videos
 ▶0:31Outswing Walk-In Tub Doors: Safer, Easier Entry ✅ #bathroomsafety #walkintubs #walkintubOutward-swing walk-in tub doors offer easier entry and more clearance, especially for wheelchair transfers. Ella's Bubbles walk-in tubs feature…used in 3 guides
 ▶1:42Why Outward-Swinging Walk-In Tubs Are Better for Safety & ComfortOutward-swinging walk-in tub doors offer easier and safer entry and exit for seniors and individuals with limited mobility. Ella's Bubbles…3 chapters · used in 6 guides
 ▶1:56Pick the Perfect Walk-In Tub Door: 5 Elegant Door Options | Ella’s BubblesElla's Bubbles walk-in tubs offer five distinct door styles, each designed for easy entry and exit, durability, and modern style. This video…5 chapters · used in 18 guides
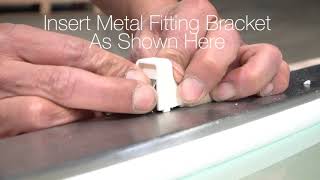 ▶0:52Ella's Bubbles: Latch Replacement for Inward Swing Stainless Steel Door Walk In Safety BathtubsCustomers can upgrade or replace the latch on an Ella's Bubbles walk-in tub with an inward-swing stainless steel door. This video demonstrates…used in 5 guides
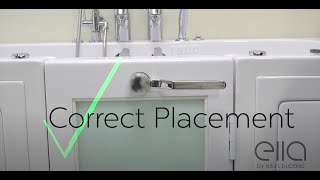 ▶1:16Ella's Bubbles: Proper Handle InstallationCustomers learn to properly install the locking handle on Ella's Bubbles outward swing walk-in tub doors. This video demonstrates correct handle…3 chapters · used in 6 guides
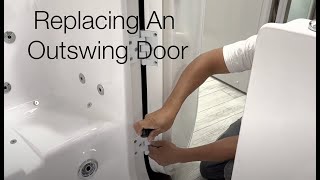 ▶1:22Ella's Bubbles: Replacing An Outward Swing DoorA technician demonstrates how to replace an outward swing door on an Ella's Bubbles walk-in tub. The video shows loosening and tightening bolts…3 chapters · used in 13 guides
 Vidéos