


Printable First Bath Checklist for a New Walk-In Tub
Updated September 2026
What should you do before the very first bath in a new walk-in tub? Run the one-time vinegar flush, check the door seal and the GFCI, then take the bath in the published order: step in, sit, lock the door, close both drains, fill above the highest jets, run the therapies, turn them off, drain completely, then open the door. Print this page and tick the boxes as you go.
Print and Tick: Before the First Fill
- u2610 Installer's water test done: 3 inches above the highest jet, 30 minutes standing, 30 minutes running
- u2610 Every leveling leg touches the floor; the door closes smoothly into a watertight seal
- u2610 Door seal restored if shipping left it stuck, then wiped with rubbing alcohol
- u2610 GFCI tested: TEST cuts power, RESET restores it; if not, power off and call a licensed electrician
- u2610 Both drain handles open and close fully
- u2610 Construction dust wiped off with a mild detergent; no abrasives on the acrylic
- u2610 No electric appliances within 3 feet of the tub
- u2610 Warranty activation form submitted, or set aside to submit promptly
The One-Time Vinegar Flush
- u2610 Mix 2 cups of white vinegar with 2 cups of water
- u2610 Close both drains; fill to 1 inch above the highest jets
- u2610 Add the mixture and run the tub for 10 minutes
- u2610 Drain completely
The same recipe is your monthly flush. Details in before your first bath.
The Bath Itself, in Order
- u2610 Heated seat, if fitted, on 10 to 15 minutes before entry
- u2610 Step in and sit fully in the seat, back on the backrest. Never enter a tub with water in it
- u2610 Close and lock the door, feet and knees clear of an inward-swing door
- u2610 Close both drains completely
- u2610 Temperature set before the water reaches you; the manuals warn that water above 100.4 F may be harmful
- u2610 Fill above the highest jets, and never above the center of the drain handle
Safety notes are in how to take a bath step by step.
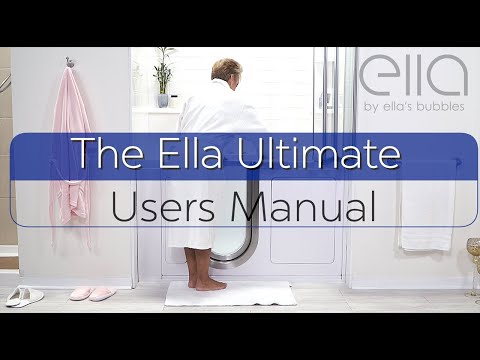
Chapters in this video
- 0:00 Getting Started With Your Tub The video begins by showing how to safely enter the walk-in tub and secure the door.
- 0:18 Understanding the Control Buttons The various function buttons for the LED light, air massage, and hydro massage are explained.
- 0:45 Filling the Tub and Foot Massage Instructions are provided for filling the tub using the Fast Fill faucet and activating the independent foot massage.
- 1:54 Full Body Soak and Air Massage The video demonstrates how to fill the tub for a full body soak and activate the air and hydro massage pumps.
- 3:01 Auto Purge System Explained The automatic Purge system is explained, detailing its function and operation after the pumps are turned off.
- 4:09 Hand Shower and Swivel Tray The multi-function hand shower and the 360-degree swivel tray are demonstrated.
- 4:51 LED Chromotherapy Light The operation of the LED light chromotherapy button is shown, including color selection and turning it off.
The video shows the order: step in, sit, lock the door, close both drains, fill above the jets, run air, hydro and foot massage with the dials. Watch: Ultimate Walk-In Tub Guide: Ella's Bubbles Explained with chapters and a full transcript.
Therapies: First Press, Dial, Purge Expectation
- u2610 Water covers every jet before any pump button is pressed; running a pump dry can cause permanent damage
- u2610 Hydro: one gentle press on; set the intensity dial
- u2610 Air: first press high, second medium, third low, fourth off
- u2610 Expect the Auto Purge about 20 minutes after the air pump is off: 120 seconds, on its own, normal
See water level before running the jets and Auto Purge explained.
Draining and Door
- u2610 Every therapy off
- u2610 Both drains fully open; stay seated. An average dual-drain tub empties in about 80 seconds under ideal conditions
- u2610 Open the door only when the tub is completely empty
Afterward: Door Open, Seal, GFCI Habit
- u2610 Leave the door open between baths to protect the seal
- u2610 Rinse the tub; rinse chrome after any salt bath; no bath bombs
- u2610 Wipe the seal and frame clean
- u2610 GFCI test made a periodic habit; monthly flush on the calendar
More in door seal cleaning and care and the new owner first-week checklist.
Related Guides
- How do you fill a walk-in tub after you get in?
- How Do I Run the One-Time Vinegar Flush on a New Ella Walk-In Tub?
- How do I run the one-time vinegar flush on a new Ella walk-in tub?
Common Questions
Do I have to run the vinegar flush before the first bath?
Which press of the air button is high speed?
The tub started blowing air after I got out, so is that a fault?
What should I do if the door will not open right after the bath?
About this guide. Answers in the Ella’s Bubbles Support Center are compiled from real conversations with tub owners, our technicians’ notes and the product documentation, then reviewed by our team. Tub models and options have evolved over the years, so a detail here may differ slightly from your exact tub. If something looks different on yours, send us your serial number and a specialist will confirm it for your model.
Did this solve your question?
If not, open a ticket and our team will pick it up from here.
Open a Support Ticket Videos