


Comment se déroule l’installation d’une baignoire à porte ?
Mis à jour Octobre 2026
L’installation d’une baignoire à porte Ella est un travail réservé à des entrepreneurs agréés, assurés et détenteurs des permis requis, qui respectent les codes locaux de plomberie et d’électricité. Les travaux suivent un ordre précis : une visite sur place avec prise de mesures, le raccordement des évacuations et de l’alimentation en eau, le branchement de l’équipement sur une prise GFCI, la mise à niveau de la baignoire et l’alignement de la porte, un essai de remplissage, puis la pose de la bride de carrelage et la finition des murs. Si vous n’avez pas encore d’entrepreneur, commencez par Obtenir des recommandations et des contacts d’installateurs pour votre baignoire à porte.
Avant Le Jour De L’installation : L’installateur Et La Visite Sur Place
Ella's Bubbles n’effectue pas d’installations et n’envoie pas de techniciens ; le processus commence donc par un entrepreneur local agréé. Ella dispose d’un réseau d’installateurs et peut vous recommander des entrepreneurs dans votre région. Lorsque vous demandez de l’aide pour en trouver un, la mise en relation se déroule ainsi :
- Ella's Bubbles transmet vos coordonnées à l’installateur recommandé.
- Les spécifications de votre modèle de baignoire et ses schémas électriques sont joints, afin que l’installateur les ait à l’avance.
- L’installateur vous contacte directement pour convenir des prochaines étapes.
- L’installateur se rend chez vous pour prendre les mesures de l’espace d’installation.
- L’installateur vous remet un devis pour les travaux d’installation.
Si vous n’avez pas encore choisi votre baignoire, Ella's Bubbles propose aussi un outil de configuration de baignoire à porte en ligne, présenté dans l’article Outil de configuration de douche. Votre revendeur Ella ou l’équipe au (800) 480-6850 peut vous communiquer le lien.
Raccordement Des Évacuations
La première vidéo, le guide d’installation d’Ella, s’ouvre sur un rappel : elle est fournie à titre éducatif uniquement et n’est pas destinée aux projets de bricolage. Elle présente ensuite le système d’évacuation que votre plombier raccordera. La majorité des baignoires à porte Ella sont équipées de la technologie à double évacuation : deux évacuations gravitaires de 2 pouces, de type T, à quatre orifices.
- Le plombier peut raccorder les quatre orifices, ou seulement ceux d’un côté, selon l’état de l’évacuation de la maison.
- Les orifices non utilisés sont fermés par des bouchons. La vidéo montre clairement les orifices bouchés.
- Les couvercles des bondes de fond sont réglables en hauteur pour une étanchéité et une vidange optimales.
- Les molettes servent de protection anti-débordement et actionnent un câble en acier inoxydable muni d'un levier pour ouvrir ou fermer chaque bonde de fond.
- Le double drain fait également office de système d'aération, permettant une évacuation rapide des poches d'air et de l'eau.
Un point à prévoir pour votre salle de bain : sur une baignoire à porte Ella, la porte et les évacuations se trouvent de côtés opposés. Face à la baignoire, un modèle avec porte à droite a ses évacuations à gauche, et un modèle avec porte à gauche a ses évacuations à droite. Vérifiez cela par rapport à l’emplacement de votre conduite d’évacuation existante avant de commander la baignoire.
Alimentation En Eau, Robinetterie Et Vannes D’arrêt
Ella propose un ensemble de robinetterie à remplissage rapide en 5 pièces ou en 2 pièces, chacun livré avec une douchette multifonction extensible. Les baignoires Ella sont expédiées avec des flexibles d’alimentation de 5 pieds ; votre plombier amène donc les arrivées d’eau chaude et froide à portée de ces flexibles.
La vidéo recommande vivement d’installer des vannes d’arrêt de 3/4 de pouce près de la baignoire, ou à proximité immédiate, pour un accès et un entretien faciles. C’est une petite étape lors de l’installation qui simplifie énormément toute intervention future, car la baignoire peut être isolée sans couper l’eau dans le reste de la maison.
Raccordements Électriques
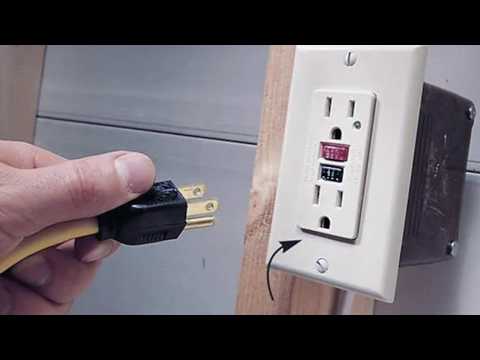
Les pompes et les autres composants électroniques d’une baignoire Ella sont certifiés UL et se branchent tout simplement sur une prise GFCI. Votre électricien installe les prises conformément au code local et aux schémas électriques de votre modèle. La vidéo demande que les composants électriques soient clairement identifiés et facilement accessibles, ce qui compte plus tard, lorsque quelqu’un doit atteindre l’équipement derrière les panneaux d’accès.
Mise À Niveau, Alignement De La Porte Et Essai D’eau
Chaque baignoire doit être parfaitement de niveau, et la porte parfaitement alignée, avant le remplissage et les essais. C’est l’étape qu’il ne faut jamais précipiter. La porte n’assure une bonne étanchéité que lorsque la baignoire repose de niveau sur son châssis.
Une fois la baignoire de niveau et raccordée, l’installateur la remplit et la teste avant toute finition des murs. La finition des murs ne doit commencer qu’après l’essai d’eau préalable et la vérification du niveau, car réparer une fuite derrière un carrelage fini est bien plus perturbant que la réparer quand tout est encore ouvert.
La Bride De Carrelage Et La Finition Des Murs
Les baignoires à porte Ella ont un rebord plat, sans lèvre intégrée, et aucune baignoire à porte Ella n’est livrée avec une bride de carrelage, par conception. La barrière d’eau au mur est une bride à coller, ajoutée lors de l’installation, comme expliqué dans Qu’est-ce qu’une bride de carrelage sur une baignoire à porte ?.
- La bride est une fine bande étanche collée au rebord de la baignoire avec du silicone 100 pour cent.
- Le carrelage ou les panneaux muraux recouvrent la bride et le rebord, de sorte que l’eau s’écoule vers la baignoire et non derrière elle.
- Chaque joint est scellé au silicone.
- Le kit de 124 pouces convient à la plupart des baignoires Ella dans une alcôve standard à trois murs de 60 pouces, et des bandes plus longues sont proposées pour les modèles plus grands.
La bride est expédiée séparément par transporteur de colis, et non dans la caisse avec la baignoire ; ne la signalez donc pas comme manquante le jour de la livraison. Le ShaK est la seule exception au plan de carrelage. Il n’est pas conçu pour être carrelé directement ; consultez donc le support technique avant de prévoir du carrelage autour d’un ShaK.
Ajouter Une Douche Par La Suite
Si vous souhaitez une douche sur la baignoire, la seconde vidéo présente le kit de colonne de douche. Il se raccorde à un ensemble de robinetterie à remplissage rapide Ella en 2 ou 5 pièces. L’installateur retire la douchette existante, installe la base de la colonne de douche dans le logement libéré, remplace le flexible d’alimentation en eau et raccorde le nouveau flexible d’un demi-pouce à l’inverseur de l’ensemble de robinetterie.
Pour toute question à n’importe quelle étape, ouvrez un ticket sur ellasbubbles.com/support ou appelez le (800) 480-6850.
Chapitres de cette vidéo
- 0:00 Avertissement important concernant l’installation Cette vidéo est fournie à titre informatif uniquement ; l’installation doit être réalisée par des entrepreneurs agréés, dans le respect des codes du bâtiment locaux.
- 0:16 La technologie à double drain d'Ella Les baignoires à porte d'Ella sont équipées de deux drains de 2 pouces pour une évacuation rapide et efficace, ainsi qu'une protection contre le débordement.
- 1:47 Ensembles de robinetterie à remplissage rapide Ella propose des ensembles de robinetterie à remplissage rapide en cinq ou deux pièces, chacun doté d’une douchette extensible et de conduites d’alimentation de cinq pieds.
- 2:18 Composants électriques et mise à niveau Les composants électriques sont clairement identifiés et accessibles, et la baignoire doit être parfaitement de niveau avant tout essai.
À regarder : Guide et conseils d’installation d’une baignoire à porte, un processus facile | Ella’s Bubbles avec chapitres et transcription complète.

À regarder : Installation facile d'une colonne de douche pour votre baignoire à porte | Ella’s Bubbles, avec chapitres et transcription complète.
Guides Associés
- Questions courantes sur l'installation : commande de carrelage, pieds de mise à niveau, sous-plancher, panneaux, diamètre de vidange et test en extérieur
- Exigences électriques par modèle : circuits GFCI dédiés pour votre baignoire à porte
- De quelle taille de chauffe-eau ai-je besoin pour ma baignoire à porte ?
- Pourquoi la planification avant l’installation est-elle si importante pour une baignoire à porte ?
Vidéos Associées

Chapitres de cette vidéo
- 0:00 Vérifications et conseils avant l'installation Avant l'installation, la vidéo insiste sur la vérification des dimensions de la baignoire, l'inspection des dommages éventuels et le test d'étanchéité de la baignoire avec de l'eau.
- 1:34 Installation du système à double vidage La vidéo montre comment installer le système à double vidage exclusif d'Ella's, présente différentes configurations et recommande une évacuation domestique de deux pouces.
- 3:09 Mise à niveau et alignement de la porte Le technicien met la baignoire de niveau afin d'assurer un bon alignement de la porte et une étanchéité parfaite, et conseille de laisser la porte déverrouillée lorsque la baignoire n'est pas utilisée.
- 3:53 Raccordements en eau et en électricité La vidéo montre le raccordement des robinets à remplissage rapide avec des conduites d'alimentation de trois quarts de pouce et insiste sur l'utilisation de prises et de disjoncteurs protégés par différentiel GFCI pour les raccordements électriques.

Chapitres de cette vidéo
- 0:00 Présentation de la technologie à double vidange La vidéo présente le système de vidange double de 2 pouces à quatre orifices d'Ella's Bubbles et son raccordement à l'évacuation de la maison.
- 0:20 Démonstration de vidange en direct Une démonstration en direct montre l'eau s'écoulant par les vidanges doubles de 2 pouces à quatre orifices.
- 0:39 Images de l'installation de la vidange Des images réelles montrent une installation de vidange avant et après la pose du système à double vidange.
- 1:01 Options de raccordement à l'évacuation de la maison La vidéo explique les raccordements recommandés à l'évacuation de la maison et comment les installateurs déterminent la meilleure configuration.
- 1:27 Poignées de vidange faciles à tourner Les poignées de vidange faciles à tourner sont présentées ; elles servent aussi de doubles évents d'air pour maximiser l'écoulement de l'eau.
- 1:40 Vidange simple et système gravitaire Certaines baignoires sont dotées d'une vidange simple surdimensionnée avec chaînette d'urgence, et le système gravitaire est mis en avant.
Questions Fréquentes
Puis-je installer une baignoire à porte moi-même ?
Ella's Bubbles envoie-t-elle quelqu'un pour installer la baignoire ?
Faut-il raccorder les quatre orifices d’évacuation ?
Quel type de prise électrique la baignoire nécessite-t-elle ?
Quand faut-il finir les murs autour de la baignoire ?
Pourquoi ma baignoire est-elle arrivée sans bride de carrelage ?
About this guide. Answers in the Ella’s Bubbles Support Center are compiled from real conversations with tub owners, our technicians’ notes and the product documentation, then reviewed by our team. Tub models and options have evolved over the years, so a detail here may differ slightly from your exact tub. If something looks different on yours, send us your serial number and a specialist will confirm it for your model.
Did this solve your question?
Sinon, ouvrez un ticket et notre équipe prendra le relais.
Ouvrir un ticket d'assistance Vidéos