


Can I install a walk-in tub myself, and what should I know first?
Mis à jour Novembre 2026
You can take on much of a walk-in tub installation yourself if you are handy, with one firm exception: the electrical connection always goes to a licensed electrician. Ella's Bubbles manufactures and supports the tub but never performs installation, and its technical support team backs you and whoever does the work for the life of the tub at no charge, including live video help. Who Installs My Walk-in Tub? Hiring a Licensed Contractor and How Ella Supports Them covers hiring a contractor; this page covers what a self-install actually involves and what to settle before the crate arrives.
What Ella Recommends, and What a Handy Owner Can Take on
Ella's recommendation is a licensed, experienced local contractor who knows your local building requirements and codes. Any licensed plumber and electrician can install an Ella tub by following the installation manuals and the directions of the technical support team, certification by Ella is not required, and you are never required to purchase installation from anyone. If you want to do most of the work yourself, the one step that always goes to a licensed electrician is the electrical connection. Everything else in the sequence below is what a self-install involves. Labor is arranged directly between you and anyone you hire, and Ella does not send technicians.
Two things make the job more approachable than it looks. Every Ella walk-in tub arrives factory tested and factory leveled, and the motors and pumps are fully installed on the tub at the factory, so there is nothing to mount in the field. The tub also ships with its dual drain installed and four open ports, ready for the plumbing connection.
The Sequence a Self-Install Follows
The installation tips video summarized in What you need before installing your Ella walk-in tub: a planning checklist runs through the whole job in the order it happens. If you are doing the work yourself, this is the order to keep:
- Confirm the tub will fit into your home. Use the shipping crate size for hallways and doorways, and remember that actual dimensions are slightly smaller than the nominal name. The Elite is listed as 30 x 52 while its actual width is under 30 inches, so it fits through a 30 inch door opening, and the Petite is listed as 28 x 52 with an actual width of 27.5 inches.
- Inspect the tub for shipping damage before anything else.
- Fill the tub with water outside the bathroom to check for transit leaks before it goes in.
- Remove all panels before moving the tub.
- Connect the dual drain. The video shows the configurations and recommends a 2 inch house drain.
- Level the tub with the paper test under each foot. Proper leveling is what lines the door up for a leak-proof seal.
- Let the door gasket recover, and leave the door unlocked when the tub is not in use.
- Connect the fast-fill faucet with 3/4 inch supply lines without over-torquing.
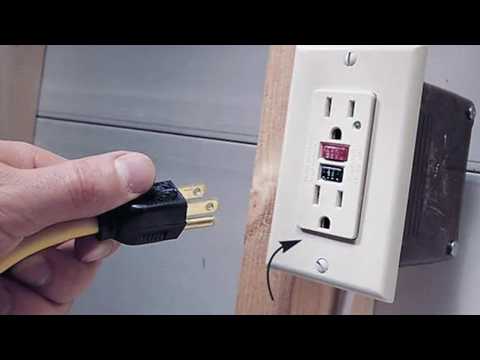
- Have your electrician connect the dedicated GFCI protected outlets and breakers.
- Run an extended fill test with the pumps running before the walls are closed.
Decisions to Make Before the Tub Arrives
On every Ella walk-in tub the door and the drains sit on opposite sides. A tub with the door on the right has its drains on the left, and a tub with the door on the left has its drains on the right, with sides described as you face the tub. That means the door side that works for the room and the drain side that works for the plumbing are decided together, and the item description on your final invoice states the hand of the tub, so read it carefully before you confirm. Choosing the Drain Side for an Alcove or Slab Installation and Prebuilding the Drain Line explains how to pick the side that keeps the drain ports reachable from the front of the tub once the alcove walls close it in.
- Build the drain line to the house drain before the tub is set in place. The two drains sit on either side of the tub's center line and their positions are dimensioned on the spec sheet, so the house connection can be located before delivery.
- There is only about half an inch of clearance under the tub for the drain line to fall toward the house drain. On a slab, a shallow trough in the concrete is worth considering even where it turns out not to be strictly necessary.
- Existing rough-in plumbing does not have to dictate the choice. Installers often move the supply and drain lines to the side that gives the best access and the right door swing for the room.
- Check the floor. The subfloor must be sound and level and rated for the tub plus water plus bather, and the house drain must flow freely.
- Plan for one or more dedicated GFCI protected circuits, and for service access to the plumbing and electrical after the walls are finished.
Download the installation manual and spec sheet from the product page's Downloads tab before the tub ships, and share them with anyone helping you. If your tub is a LayDown, note that it is the one Ella family with a single 2 inch brass drain rather than the dual drain, and that the LayDown60 has no faucet option and needs a wall-mounted faucet you supply. Those differences are covered in Installing the LayDown Tubs, Part 2: The Single 2 Inch Drain, Faucet by Size, Electrical, Therapy Controls and Wall Finishing.
Mistakes That Damage the Tub or the Warranty
- Never drill into the tub shell or deck to add a grab bar. The factory drills the holes for the included bar before the tub ships, and any alteration not done by Ella is excluded from warranty coverage. Extra bars belong on the walls, anchored into studs or solid in-wall backing, at the heights given in Where and how should grab bars be installed around a walk-in tub?.
- Install the deck-mount grab bar with its large metal washer under the shell. Fitting the bar without it can crack the acrylic.
- Do not over-torque fittings. The shower column video on this page is explicit that over-tightening damages the rubber washer and could cause a leak, and the same rule applies to the 3/4 inch supply lines.
- Do not skip the water test outside the bathroom. A transit leak found after the walls are finished is far harder to reach.
- Do not share a circuit. Each therapy system needs its own dedicated GFCI protected line from a licensed electrician.
Keep the warranty picture in mind as you weigh the decision. Ella's warranty supplies replacement parts, and the labor to fit them is done by a local licensed plumber or electrician, so the labor side of a self-install is yours to carry.
The Extension Panel and Finishing the Walls
When the tub is shorter than the opening it sits in, Ella's extension panel closes the gap, and the second video on this page shows how. The presenter calls it the fill kit: the tub is set first, and the panel is then cut to whatever the walls are, square or not, so the finish looks seamless and you gain a shelf for soaps and towels. Underneath, adjustable stainless steel brackets screw up and down as an extension of the tub frame, so the panel is supported as one component of the tub rather than hanging on silicone that could crack. If your model uses one, make the cut after the tub is leveled, not before.
How Ella Supports a Self-Install
- Complete installation manuals and specification sheets for every model on each product page's Downloads tab.
- Free lifetime technical support by phone and email for you and anyone working with you.
- Live video chat on request, where the agent can see your tub and point you in the right direction.
- A full installation videos library in the order an installation actually happens.
If you decide partway through that you would rather hand the job to a professional, the team at (800) 480-6850 can locate a local company through Ella's nationwide network of installers, including Angi Pro, or you can hire any local licensed plumber and electrician you trust.

Chapters in this video
- 0:00 Extension Panel for Seamless Installation The video introduces the extension panel, also called a fill kit, which allows for custom cutting to fit various wall spaces.
- 0:35 Integrated Shelf Support Bracket The video shows the integrated shelf support brackets, which are adjustable and made of stainless steel.
- 0:52 Panel Support and Durability The video explains how the integrated support prevents issues like silicone cracking or panel failure, making it a durable component.
Watch: Walk-In Tub Extension Panels for Seamless Installation - Voted Best/Safest 2020 | Ella’s Bubbles with chapters and a full transcript.

Chapters in this video
- 0:00 Introduction to Walk-In Tub The video begins with an overview of the Ella's Bubbles walk-in tub, highlighting its features and design.
- 0:23 Installation of Shower Column A technician demonstrates the process of installing the shower column kit, ensuring proper alignment and secure fitting.
- 1:00 Connecting the Faucet System The video shows how to connect the five-piece faucet system to the walk-in tub, detailing each step for a secure connection.
- 1:49 Final Adjustments and Testing The technician makes final adjustments to the tub and tests the water flow and drainage to ensure everything is working correctly.
Watch: Ellas Bubbles - Walk In Bathtub Shower Column Kit Install With Five Piece Faucet with chapters and a full transcript.
Related Guides
- What Is the Installation Process for a Walk-In Tub Like?
- Common Installation Questions: Tile Order, Leveling Legs, Subfloor, Panels, Drain Size and the Outdoor Test
- How Do I Caulk and Seal a Walk-In Tub Against the Walls?
Related Videos

Chapters in this video
- 0:00 Pre-Installation Checks and Tips Before installation, the video emphasizes checking tub dimensions, inspecting for damage, and leak-testing the tub with water.
- 1:34 Dual Drain System Installation The video demonstrates how to install Ella's exclusive dual drain system, showing various configurations and recommending a two-inch house drain.
- 3:09 Leveling and Door Alignment The technician levels the tub, ensuring proper door alignment for a leak-proof seal, and advises leaving the door unlocked when not in use.
- 3:53 Water Supply and Electrical Connections The video shows connecting fast-fill faucets with three-quarter inch supply lines and emphasizes using GFCI-protected outlets and breakers for electrical connections.
Chapters in this video
- 0:00 Important Installation Disclaimer This video is for educational purposes only and requires licensed contractors to follow local building codes.
- 0:16 Ella's Technologie double vidange Ella's walk-in tubs feature dual 2-inch drains for fast, efficient drainage and overflow protection.
- 1:47 Fast Fill Faucet Sets Ella offers five-piece or two-piece fast-fill faucet sets, each with an extendable hand shower and five-foot supply lines.
- 2:18 Electrical Components And Leveling Electrical components are clearly marked and accessible, and the tub must be perfectly level before testing.

Chapters in this video
- 0:00 Ella Standard Walk-In Tub Overview The video introduces the Ella Standard walk-in tub, highlighting its size and design for average bathers.
- 0:27 Fitting Tub Into Alcove Tips are provided for fitting the tub into a 60-inch alcove, including trimming the apron or using the standard end piece.
- 0:49 Hydro Massage System Features The tub's 18-jet hydro massage system is described, including its intensity control dial and inline water heater.
- 1:14 Drainage And Adjustable Frame The oversized two-inch drain and adjustable frame with access points for door adjustments are showcased.
Questions fréquentes
Do I have to use an installer certified by Ella?
Which part of the installation can I never do myself?
Does the tub arrive with the pumps already mounted?
What is the first thing to do when the tub arrives?
Will installing the tub myself affect the warranty?
Can I get live help during the installation?
About this guide. Answers in the Ella’s Bubbles Support Center are compiled from real conversations with tub owners, our technicians’ notes and the product documentation, then reviewed by our team. Tub models and options have evolved over the years, so a detail here may differ slightly from your exact tub. If something looks different on yours, send us your serial number and a specialist will confirm it for your model.
Did this solve your question?
Sinon, ouvrez un ticket et notre équipe prendra le relais.
Ouvrir un ticket d'assistance Vidéos