


What happens during walk-in tub installation, and how long is the bathroom unusable?
Walk-in tub installation follows a set shape: the installer confirms the tub clears your doorways, inspects it and water-tests it while your existing bathing area is still usable, then removes what is needed in the bathroom, carries the tub in by its frame, sets and levels it, connects the plumbing, has a licensed electrician provide and test the dedicated GFCI-protected circuits, and fills and runs the tub again before the walls are closed. How long your bathroom is out of use is set by your installer's scope and by your existing plumbing, electrical and framing, not by Ella's Bubbles, so ask your installer for that figure in writing. How your walk-in tub ships and how to prepare for delivery day covers the days before the installer arrives; this page covers the installation itself and what decides how long it takes.
Before Anything Is Torn Out
The first part of the job happens while your old tub or shower is still in service, and it is the part that protects you from a bathroom that has been opened up with no working tub to put in it.
- Measure the path. The installer confirms the tub's actual dimensions clear every doorway and hallway between your entrance and the bathroom. The tub is delivered as one fully assembled unit, so it has to fit through as a whole.
- Inspect for transit damage. The crate is opened and the unit is checked for damage from shipping. Keep all packaging material until your installation is complete.
- Water-test the tub. The installer fills the tub with water to check for leaks before it goes into the room. This is best done while your existing bathing area is still usable, because a problem found at this stage can be dealt with before any demolition starts.
Because the freight driver lowers the crate to the curb or driveway and does not enter the home or carry the tub inside, this stage also needs your installer or two able helpers to move the crate. A garage or covered area is the ideal place for the tub to wait if the installation is not happening the same day.
What Happens on Installation Day
- Assessing the bathroom. The installer looks at the space and decides what has to come out. This can include cutting or removing some existing tile.
- Carrying the tub in. The removable access panels come off so the tub can be carried by its frame, and the tub is brought into the bathroom.
- Setting and leveling. The tub is positioned where it will live, then set and leveled.
- Plumbing connections. The supply lines and the drain are connected. Ella tubs drain by gravity alone, with no drain pump anywhere in the tub, so the house drain has to sit at or below the tub's drain outlets. If the only connection available is higher than the outlets, such as a washing machine box, your plumber adds a pump as part of the house plumbing, as Draining to a Washing Machine Box or a Drain Higher Than the Tub: Why Gravity Drains Need a Pump explains. When planning where the drain line lands, remember that the drains sit on the opposite side of the tub from the door: a right-side door tub has its drains on the left, and a left-side door tub has its drains on the right, as you face the tub.
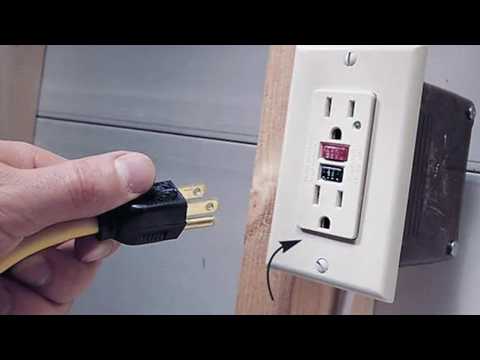
- Electrical. A licensed electrician provides and tests the circuits your therapy package requires. The video on this page is Ella's own explanation of the rules: every connection from the tub to your home power supply must use dedicated GFCI-protected outlets, the tub cannot share a circuit with any other appliance, the breaker box must use GFCI-protected breakers, and the amperage needed depends on how many pumps and components your tub has. Ella labels the electrical lines at the factory so each one is easy to identify, and the electrical requirements for each jetting package are listed under the jetting packages tab on the compare page at ellasbubbles.com, including how many lines and outlets a given tub needs.
- Final test. Before the walls are closed and the access panels go back on, the tub is filled and run so every connection is confirmed watertight and every function works.
What Decides How Long the Bathroom Is Unusable
Ella's Bubbles does not publish an installation time, because the tub is only one part of the job. The bathroom is out of use from the moment the old fixture comes out until the final test is done, and the length of that window depends on what your installer finds in the room:
- Demolition scope. Whether existing tile has to be cut or removed, and how much.
- Plumbing. Whether the existing supply and drain line up with the new tub's connections, whether the house drain is low enough for a gravity connection, and whether a floor-level drain run or a pump is needed.
- Electrical. How many dedicated GFCI-protected lines your therapy package needs, and whether the electrician can run them and fit GFCI breakers in the panel.
- Framing. Whatever carpentry the room needs for the tub to fit and the walls to close again.
- Panel work. Refitting the access panels and finishing around the tub.
Because all of that is your installer's scope, the installer is the only person who can say how many days your bathroom will be out of service. When an installer visits to take measurements and gives you a written estimate for the work, ask for the demolition, leveling, connections and panel work to be spelled out, and ask for the days out of use in writing alongside them. If you want a second opinion, Getting Installer Referrals and Leads for Your Walk-In Tub explains how Ella can connect you with a recommended contractor in your area, who receives your tub's specifications and electrical diagrams ahead of time and then contacts you to measure and estimate.
Who Does What
Ella's Bubbles manufactures the tub and does not send technicians, so a licensed local contractor does the installation. What Ella provides is free technical support at (800) 480-6850 if your contractor has a question mid-project, plus the installation manual and video library for your model, which your installer can use before and during the job. When Ella refers an installer, it sends that installer your contact information, the tub specifications and the electrical diagrams for the model being installed, so the contractor arrives already knowing what the tub needs.
For you, the practical preparation is simple: have the path measured against the shipping size, line up your installer or two able helpers for delivery day, keep every piece of packaging until the job is finished, and make sure the installer has seen the electrical requirements for your jetting package before the electrician is booked. The more of that is settled before the old fixture comes out, the shorter the gap between losing your old bath and using your new one.
Related Guides
- Before Your Installer Leaves: The 16 Checks Explained in Plain Language and Why Each One Protects Your Warranty
- Electrical requirements by model: dedicated GFCI circuits for your walk-in tub
- What Size Water Heater Do I Need for My Walk-in Tub?
Related Videos

Preguntas comunes
Does Ella's Bubbles install the walk-in tub itself?
How many days will my bathroom be out of service?
Does the installer test the tub before putting it in?
Does a walk-in tub need its own electrical circuit?
What if my house drain is higher than the tub drain?
What can I do before installation day to prepare?
About this guide. Answers in the Ella’s Bubbles Support Center are compiled from real conversations with tub owners, our technicians’ notes and the product documentation, then reviewed by our team. Tub models and options have evolved over the years, so a detail here may differ slightly from your exact tub. If something looks different on yours, send us your serial number and a specialist will confirm it for your model.
Did this solve your question?
Si no, abre un ticket y nuestro equipo se encargará a partir de aquí.
Abrir un ticket de soporte Vídeos