


Comment installe-t-on une baignoire à porte dans une salle de bain existante, étape par étape ?
Mis à jour Octobre 2026
Une baignoire à porte s'installe dans une salle de bain existante par un entrepreneur local agréé, le plus souvent dans l'alcôve à trois murs où se trouvait auparavant une baignoire standard de 60 pouces. La baignoire repose sur son propre châssis en acier inoxydable et ses pieds de mise à niveau : le travail consiste donc à préparer l'espace, mettre la baignoire à niveau, raccorder la plomberie et l'électricité, effectuer un test d'étanchéité, et seulement ensuite finir les murs autour. Qu'est-ce qu'une installation en alcôve pour une baignoire à porte ? explique l'emplacement le plus courant, et cette page décrit l'ensemble des travaux dans l'ordre.
Qui Réalise L'installation
Ella's Bubbles fabrique la baignoire et ne réalise pas les installations. Le travail est confié à un entrepreneur local agréé et expérimenté, généralement un plombier et un électricien. L'assistance technique d'Ella est gratuite et accompagne votre entrepreneur avec des manuels et une aide vidéo en direct. Tout installateur agréé convient ; aucune certification par Ella n'est requise.
Cette répartition s'applique aussi à la garantie. La garantie limitée à vie d'Ella couvre les pièces, tandis que la main-d'œuvre est garantie par l'entrepreneur indépendant qui a réalisé les travaux. C'est une bonne raison de choisir un installateur de confiance et de conserver ses coordonnées avec les documents de votre baignoire.
Où Placer La Baignoire Dans Une Salle De Bain Existante
La plupart des salles de bain ont été conçues autour d'une baignoire de 60 pouces, c'est donc généralement cet espace que vous devez combler. Dans une installation en alcôve, la baignoire est encastrée à l'arrière et aux deux extrémités, seul le tablier avant restant apparent. Toutes les baignoires Ella s'adaptent à une alcôve.
- Les baignoires de 60 pouces ou plus remplissent l'espace à elles seules. Une baignoire de 60 pouces comme l'Ultimate mesure en réalité 59,5 pouces, ce qui explique pourquoi elle ne nécessite aucun panneau d'extension.
- La plupart des modèles de 52 et 55 pouces utilisent un panneau d'extension Ella qui se fixe à l'extrémité du châssis de la baignoire et comble l'espace, pour une installation finie à l'aspect encastré.
- Quelques modèles, comme le Front Entry et le Mobile, n'ont pas de panneau d'extension : l'installateur réalise alors l'ossature et la finition de l'espace restant.
L'alcôve n'est pas la seule option. Les baignoires Ella sont finies pour une exposition à l'avant et aux extrémités : chaque modèle comprend un tablier avant fini et un panneau d'extrémité réversible, et un second panneau d'extrémité est disponible. Aucun modèle Ella n'est doté d'un habillage d'usine pour le côté opposé à la porte ; partout où l'arrière ne s'appuie pas contre un mur existant, votre entrepreneur construit donc un muret derrière la baignoire. Qu'est-ce qu'un muret derrière une baignoire à porte ? traite ce mur en détail. Avec un muret, n'importe quel modèle peut s'installer dans une alcôve à trois murs, dans un angle, contre un seul mur arrière avec les deux extrémités dégagées, ou au milieu d'une grande salle de bain.
La Séquence D'installation
L'ordre est important, car les murs ne sont fermés qu'une fois l'étanchéité de la baignoire vérifiée. Un chantier type dans une salle de bain existante suit ces étapes.
- Mesurez le passage et l'ouverture. Mesurez le point le plus étroit de chaque porte extérieure, porte intérieure, couloir et escalier entre le point de livraison et la salle de bain. Mesurez ensuite la largeur de l'ouverture de mur à mur, à l'arrière et à l'avant. Basez-vous toujours sur les dimensions réelles de la fiche technique et non sur le nom nominal du modèle.
- Vérifiez le côté de la porte et celui de l'évacuation. La porte et les évacuations se trouvent sur des côtés opposés d'une baignoire à porte Ella. Une baignoire avec porte à droite a ses évacuations à gauche, et une baignoire avec porte à gauche a ses évacuations à droite, lorsque vous êtes face à la baignoire. Votre entrepreneur compare cela avec l'emplacement de l'évacuation de la maison.
- Réalisez l'ossature nécessaire à la configuration. Dans une alcôve, il peut s'agir simplement de l'espace pour un panneau d'extension. À l'écart d'un mur, l'entrepreneur construit l'ossature du muret à la hauteur finie de votre modèle.
- Préparez la plomberie et l'électricité. L'entrepreneur fait passer l'évacuation sous la baignoire si celle de la maison se trouve du côté opposé, et place les prises et les vannes d'arrêt à portée des cordons et des conduites d'alimentation.
- Posez et mettez à niveau la baignoire. La baignoire ne dépend pas des murs pour son soutien. Elle est mise à niveau sur ses propres pieds, chacun étant en contact avec le sol.
- Effectuez le test d'étanchéité préalable à l'installation. La baignoire est testée à l'eau avant toute fermeture. Ce n'est qu'après ce test que l'entrepreneur ferme le mur.
- Finissez les murs. Les murs au-dessus du plan de la baignoire sont finis avec du carrelage ou un habillage posé sur un rebord de carrelage ajouté après coup, afin que l'eau retourne dans la baignoire. Chaque joint est fini au silicone.
Demandez à votre installateur de photographier l'ossature et l'emplacement des vannes d'arrêt avant la fermeture du mur. Ces photos sont d'une aide précieuse des années plus tard si un raccordement nécessite une intervention.
L'accès Pour L'entretien, L'étape Facile À Oublier
Les pompes, le chauffe-eau et les cordons se trouvent derrière le tablier avant ; le tablier et ses trappes d'accès doivent donc rester accessibles quelle que soit la configuration. Une alcôve ajoute une considération supplémentaire. L'extrémité plomberie de la baignoire est contre un mur, ce qui limite l'accès pour l'entretien. Demandez à votre installateur d'ajouter une trappe d'accès murale derrière l'extrémité plomberie, afin de pouvoir atteindre les pompes et les raccords d'évacuation sans toucher au carrelage.
Deux autres règles protègent l'équipement et la finition :
- N'isolez pas autour de l'équipement. L'espace autour de la baignoire ne doit jamais être rempli d'isolant.
- Lorsque les deux extrémités de la baignoire sont apparentes, ajoutez le second panneau d'extrémité pour un aspect fini. Il peut être inclus dans votre commande auprès de votre revendeur Ella ou de l'équipe au (800) 480-6850, ou demandé ultérieurement.
Les Options De Douche Qui Modifient L'installation
Décidez avant le jour de l'installation si la baignoire servira aussi pour la douche, car certains accessoires dépendent de la configuration. Chaque ensemble de robinetterie à remplissage rapide Ella comprend une douchette à main extensible, et un kit de colonne de douche en option ajoute une douche de pluie en hauteur à une baignoire équipée d'une robinetterie à remplissage rapide Ella 2 pièces ou 5 pièces montée sur le plan. Peut-on se doucher dans une baignoire à porte ? Douchettes à main, colonnes de douche et pare-douches compare les options.
- Une colonne de douche installée sur une baignoire avec panneau d'extension utilise le raccord de tuyau long de 4 à 5 pouces pour atteindre le mur.
- Le pare-douche en verre à 4 volets se transforme en pare-douche à 3 volets en retirant une section, ce qui lui permet de s'adapter à une baignoire de 52 pouces dans une alcôve de 60 pouces avec panneau d'extension.
- Ne fixez pas la douchette à main sur un support mural sans avoir installé le flexible d'extension avec la protection à barillet. Sans elle, l'eau peut s'écouler le long du flexible et fuir derrière la baignoire, là où vous ne pouvez pas la voir.
Une Fois La Baignoire Posée
Deux tâches rapides achèvent le travail. D'abord, rincez le système avant le premier bain. Mélangez 2 tasses de vinaigre blanc avec 2 tasses d'eau, remplissez la baignoire d'eau jusqu'à un pouce au-dessus des jets les plus hauts, ajoutez le mélange, faites fonctionner la baignoire pendant 10 minutes, puis vidangez. Ce même rinçage est à répéter une fois par mois.
Ensuite, activez la garantie. L'activation est nécessaire pour que la garantie prenne effet, et le formulaire d'activation de 2 pages doit être rempli et signé à la fois par le client et par l'installateur. Le plus simple est de le faire pendant que votre installateur est encore sur place. Pour toute question sur le formulaire, contactez l'équipe via ellasbubbles.com/support ou au (800) 480-6850.
Guides Associés
- Questions courantes sur l'installation : commande de carrelage, pieds de mise à niveau, sous-plancher, panneaux, diamètre de vidange et test en extérieur
- Questions électriques courantes : 15 ou 20 ampères, un circuit ou deux, GFCI à la prise ou au disjoncteur, étiquettes et schémas des cordons
- Questions courantes de plomberie : un siphon ou deux, Y ou T, évacuations centrales, évacuation vers le sol, filetages d'alimentation et absence de pompe d'évacuation
- Les installateurs d'Ella peuvent-ils élargir l'encadrement de ma porte, ou dois-je faire appel à un entrepreneur ?
- Ella's Bubbles installe-t-il des baignoires à porte, et comment trouver un installateur ?
- Dois-je installer le nouveau revêtement de sol de la salle de bain avant ou après la baignoire à porte ?
Vidéos Associées

Chapitres de cette vidéo
- 0:00 Vérifications et conseils avant l'installation Avant l'installation, la vidéo insiste sur la vérification des dimensions de la baignoire, l'inspection des dommages éventuels et le test d'étanchéité de la baignoire avec de l'eau.
- 1:34 Installation du système à double vidage La vidéo montre comment installer le système à double vidage exclusif d'Ella's, présente différentes configurations et recommande une évacuation domestique de deux pouces.
- 3:09 Mise à niveau et alignement de la porte Le technicien met la baignoire de niveau afin d'assurer un bon alignement de la porte et une étanchéité parfaite, et conseille de laisser la porte déverrouillée lorsque la baignoire n'est pas utilisée.
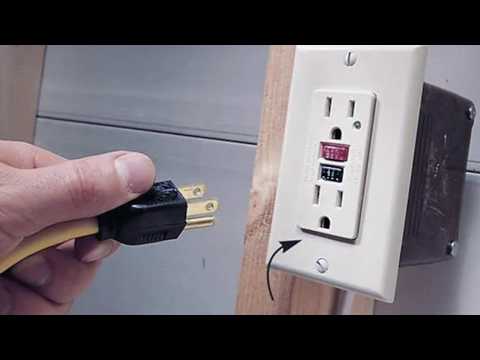
- 3:53 Raccordements en eau et en électricité La vidéo montre le raccordement des robinets à remplissage rapide avec des conduites d'alimentation de trois quarts de pouce et insiste sur l'utilisation de prises et de disjoncteurs protégés par différentiel GFCI pour les raccordements électriques.
Chapitres de cette vidéo
- 0:00 Avertissement important concernant l’installation Cette vidéo est fournie à titre informatif uniquement ; l’installation doit être réalisée par des entrepreneurs agréés, dans le respect des codes du bâtiment locaux.
- 0:16 La technologie à double drain d'Ella Les baignoires à porte d'Ella sont équipées de deux drains de 2 pouces pour une évacuation rapide et efficace, ainsi qu'une protection contre le débordement.
- 1:47 Ensembles de robinetterie à remplissage rapide Ella propose des ensembles de robinetterie à remplissage rapide en cinq ou deux pièces, chacun doté d’une douchette extensible et de conduites d’alimentation de cinq pieds.
- 2:18 Composants électriques et mise à niveau Les composants électriques sont clairement identifiés et accessibles, et la baignoire doit être parfaitement de niveau avant tout essai.

Chapitres de cette vidéo
- 0:00 Présentation de la baignoire à porte Ella Standard La vidéo présente la baignoire à porte Ella Standard, en mettant en avant ses dimensions et sa conception adaptée aux baigneurs de gabarit moyen.
- 0:27 Installation de la baignoire dans une alcôve Des conseils sont donnés pour installer la baignoire dans une alcôve de 60 pouces, notamment en recoupant le tablier ou en utilisant l'embout standard.
- 0:49 Caractéristiques du système d'hydromassage Le système d'hydromassage à 18 jets de la baignoire est décrit, avec sa molette de réglage de l'intensité et son chauffe-eau en ligne.
- 1:14 Évacuation et châssis réglable La bonde surdimensionnée de deux pouces et le châssis réglable, doté de points d'accès pour le réglage de la porte, sont présentés.
Questions Fréquentes
Ella's Bubbles installe-t-elle la baignoire à porte pour moi ?
Une baignoire à porte tiendra-t-elle à la place de mon ancienne baignoire ?
Une baignoire à porte a-t-elle besoin des murs pour se maintenir ?
Quand faut-il fermer les murs autour de la baignoire ?
De quel côté se trouvent les évacuations d'une baignoire à porte ?
Une baignoire à porte peut-elle être installée à l'écart des murs ?
About this guide. Answers in the Ella’s Bubbles Support Center are compiled from real conversations with tub owners, our technicians’ notes and the product documentation, then reviewed by our team. Tub models and options have evolved over the years, so a detail here may differ slightly from your exact tub. If something looks different on yours, send us your serial number and a specialist will confirm it for your model.
Did this solve your question?
Sinon, ouvrez un ticket et notre équipe prendra le relais.
Ouvrir un ticket d'assistance Vidéos